If you have to machine disk shaped pieced you have always to struggle to set them up in the chuck to run true – There are different ways to takle that problem:
Parallels behind the work (Don’t forget to take them out before you turn on the machine..) – Works most of the time, but generally not very precise.
Chuck spiders like the Posistop – Expensive, prone to get inaccurate from chips and burr
Soft jaws with a recess bored into them – You never have soft jaws that are suitable for the job at hand…
Magnetic Chuck – Works obviously only with ferromagnetic materials like steel.
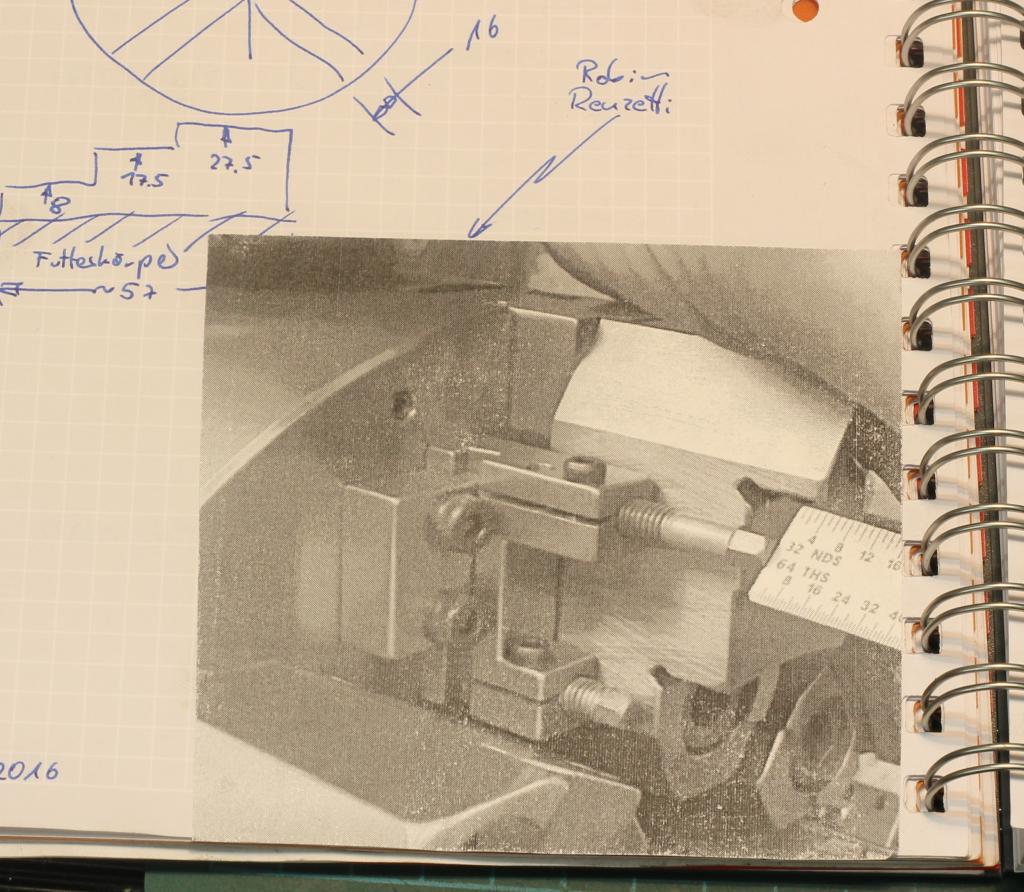
Robin Renzetti showed this very neat backstop for his lathe chuck, which is fully adjustable in position and depth:
Check out his video about modified calipers, where he shows it (Around 23:50)
I liked the basic design very much and saw the advantages, over the Positop backstop immediately.
The problem was, that my chuck seems to be a good portion smaller than the one he has on his Hardinge, so the height adjustment was out of the race. I decided to go with standoffs that have a fixed height that are hardened and ground to the perfect same height.
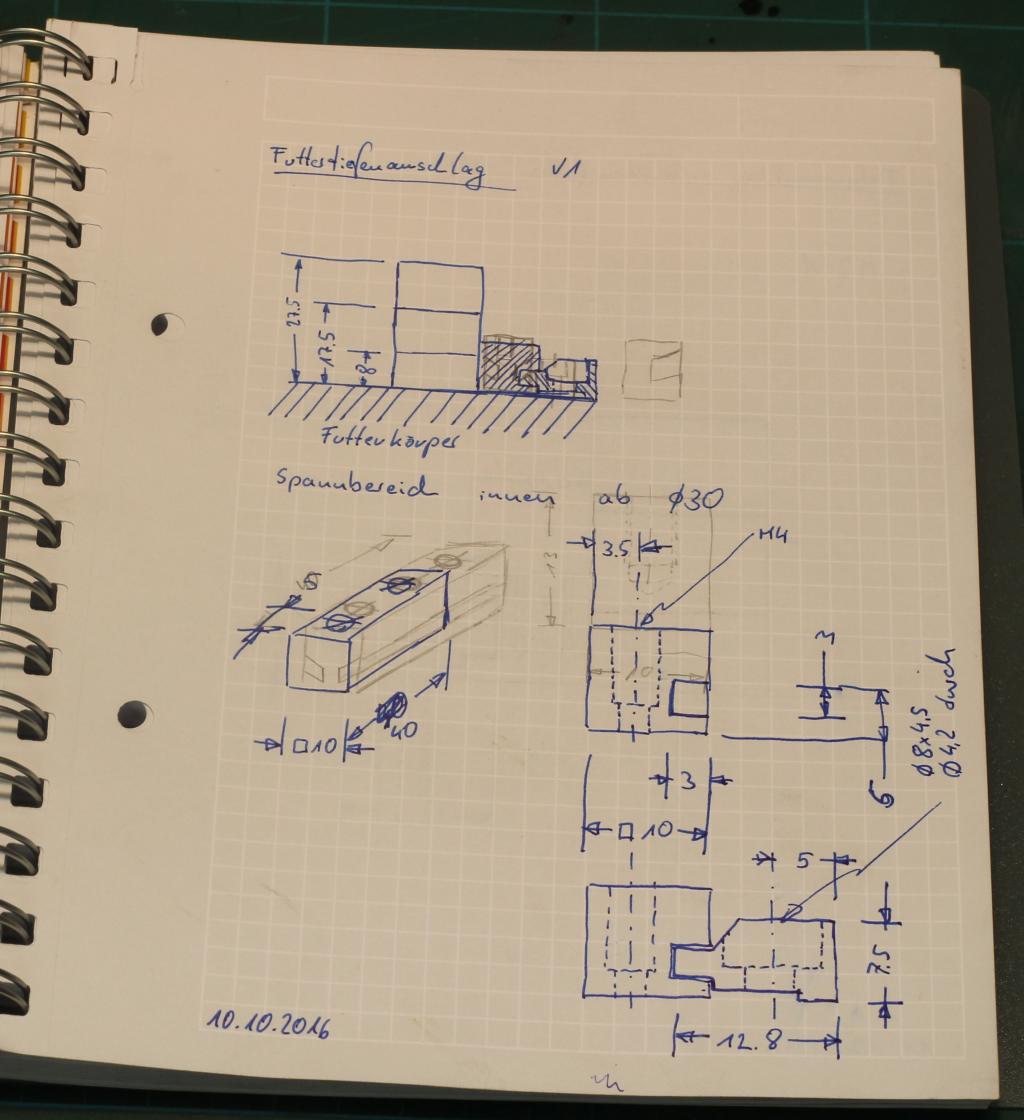
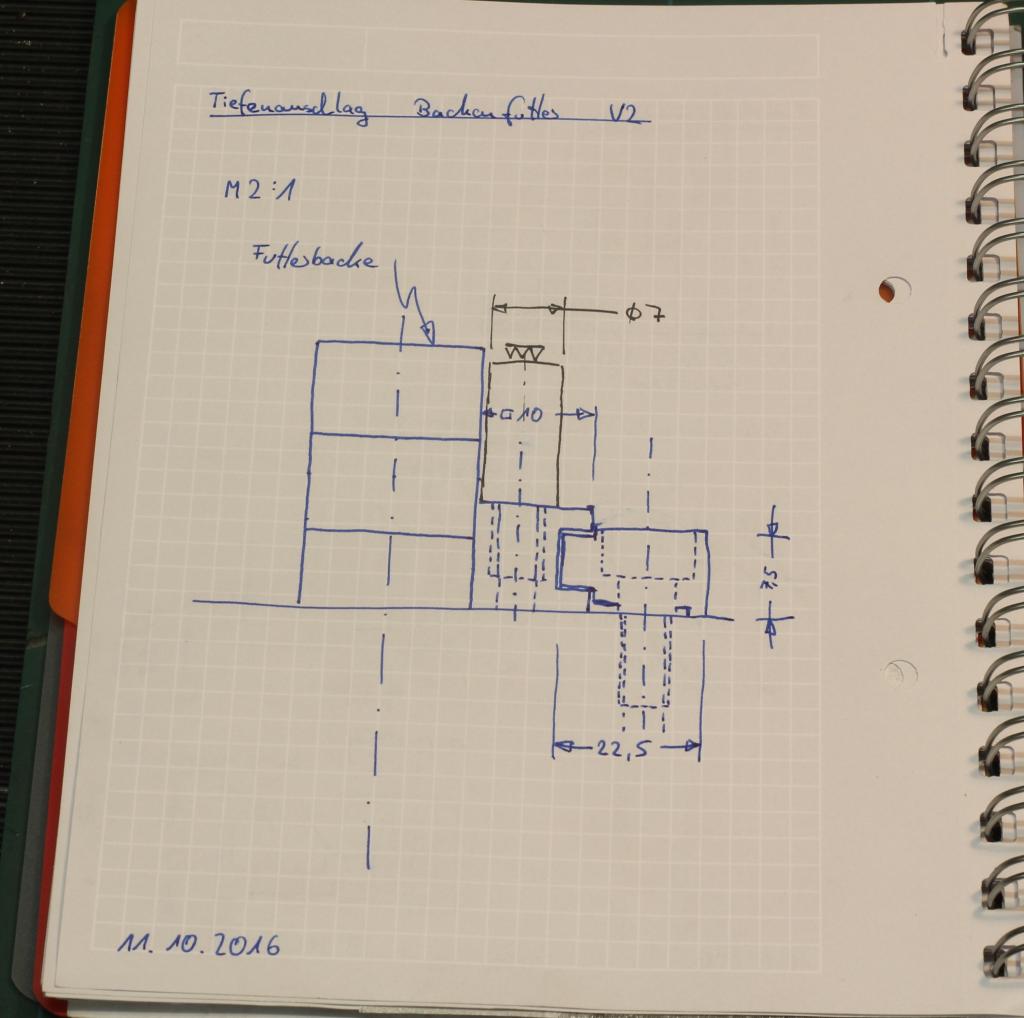
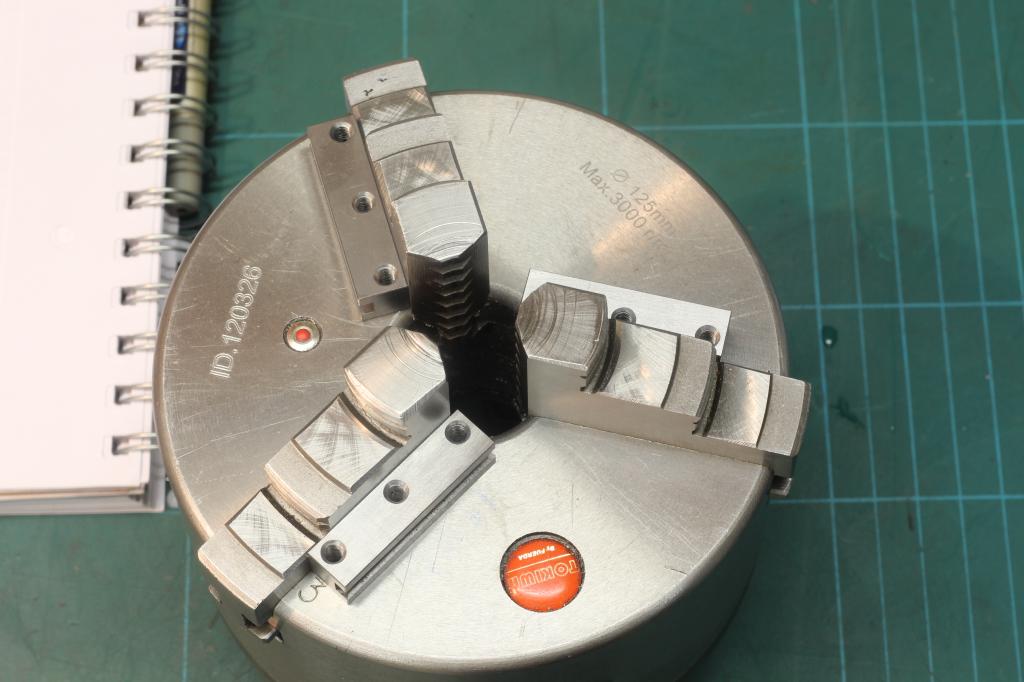
I did some sketches according to the measurements of my three jaw chuck on the lathe:
I started out with a piece of toolsteel that I ground square and to size:

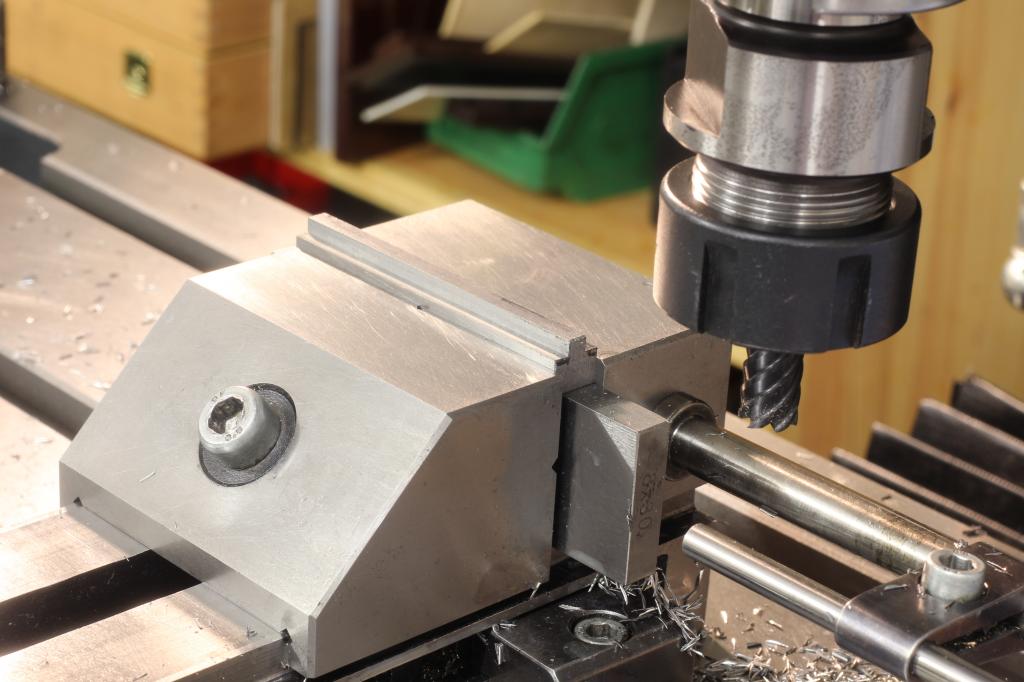
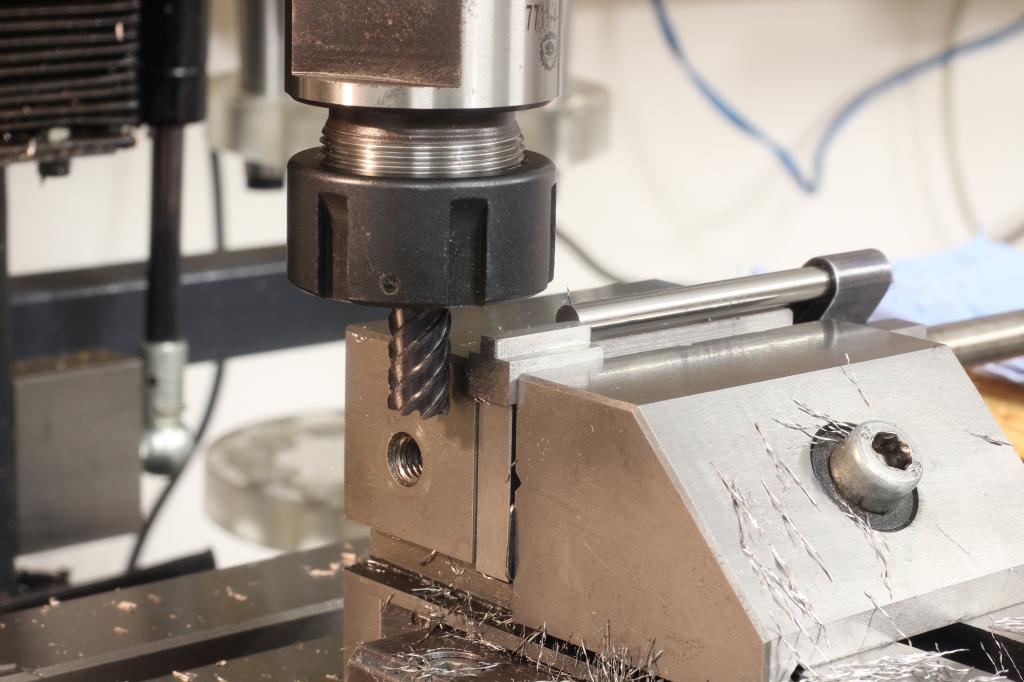
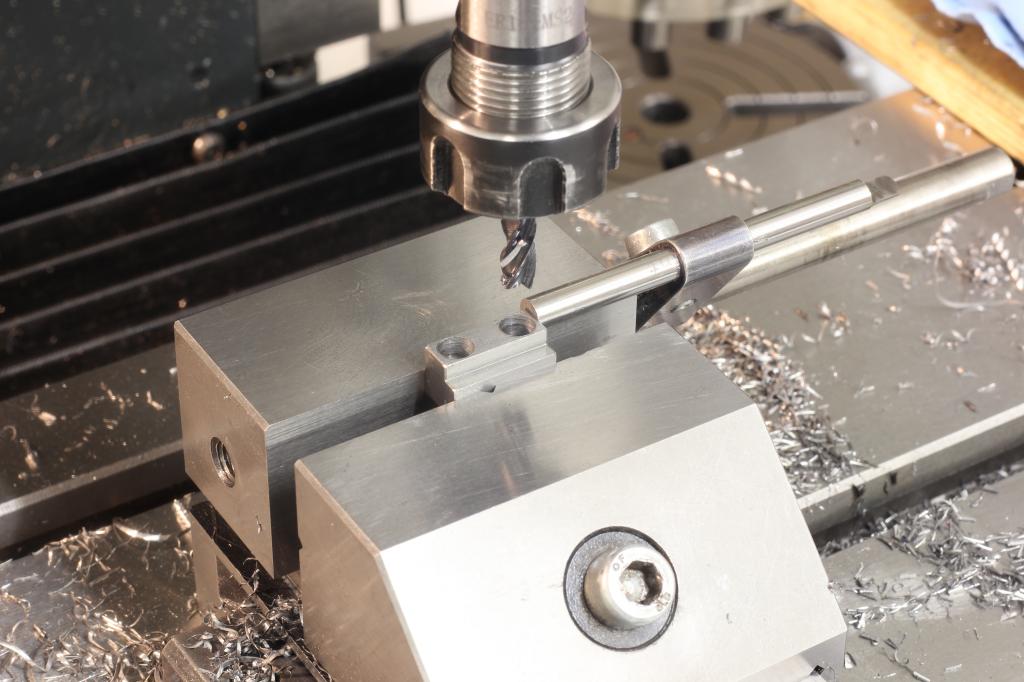
Then I changed over to the milling machine, aligned the part with the travel of the axis and milled in the slot to clamp the part to the chuck:
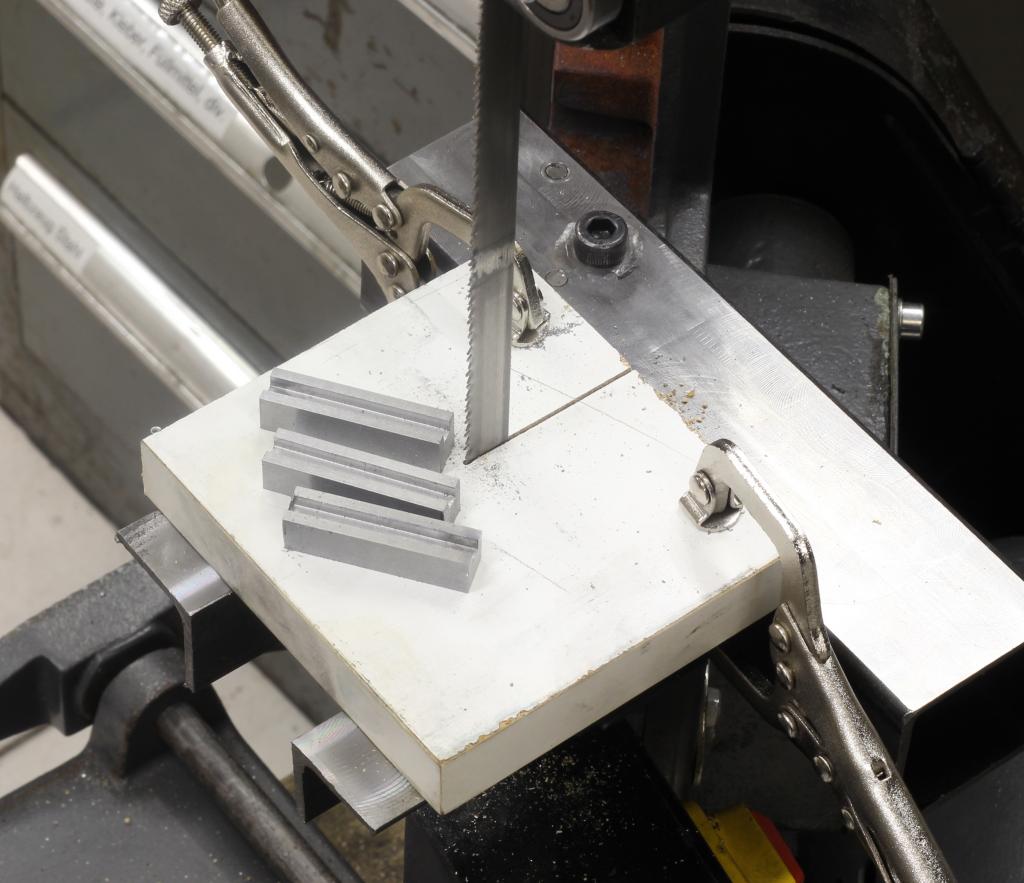
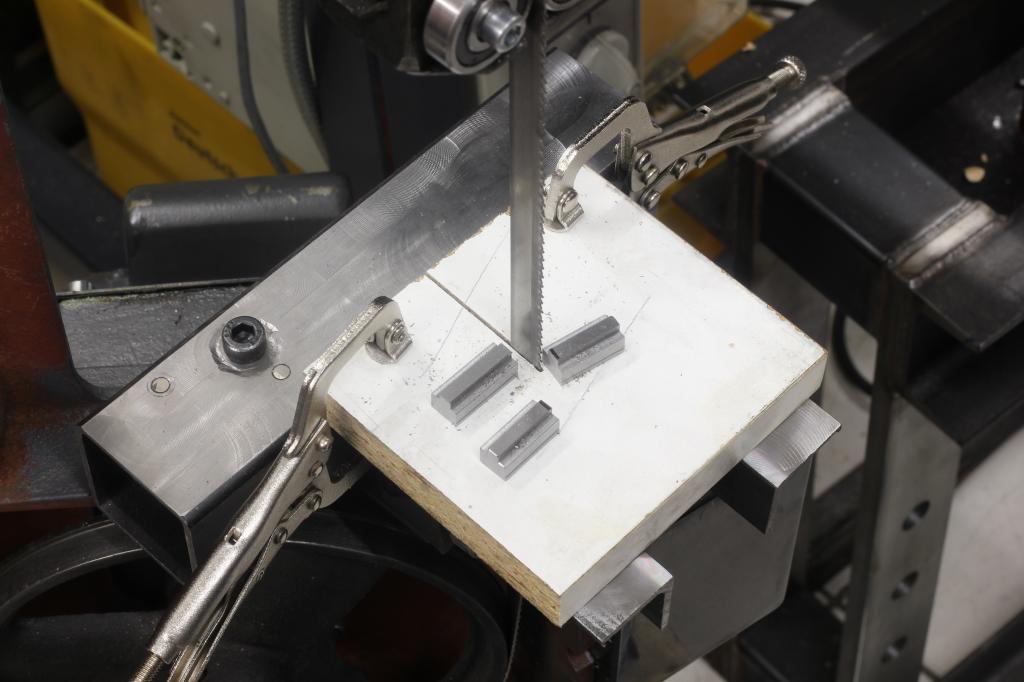
After milling I went to the bandsaw and cut the part into three separate pieces:
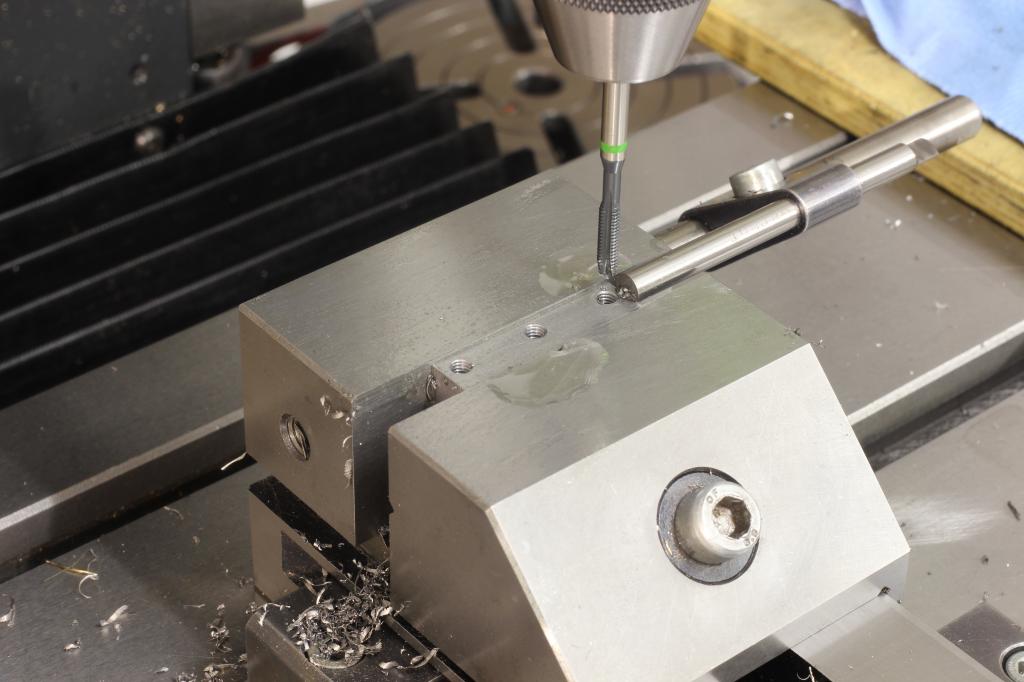
After machining them to length I drilled and tapped the M4 threads for the standoffs:
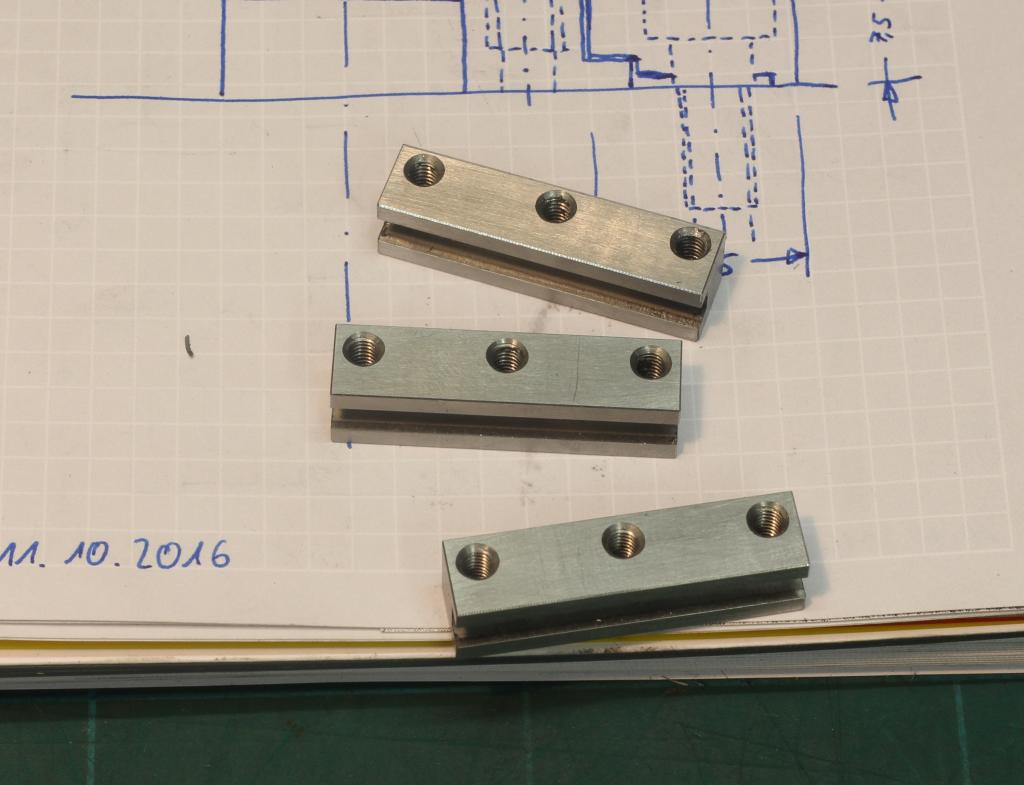
The finished sliding parts for the stop, all edges and corners got chamfered and rounded over slightly:
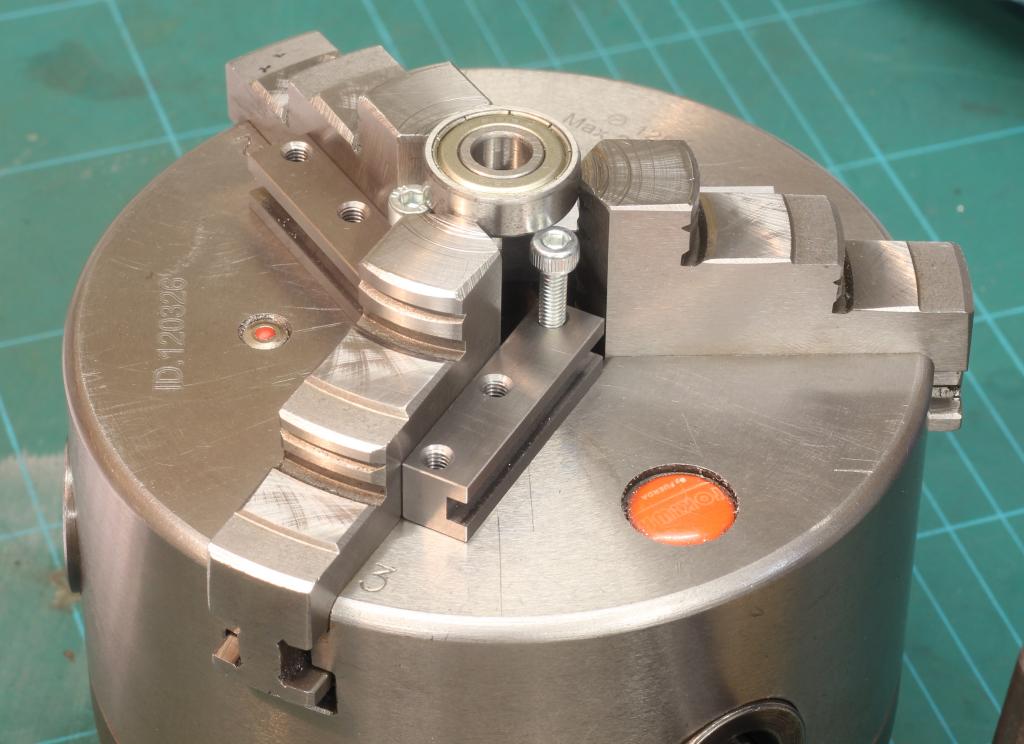
And this is a mockup how the parts will sit on the chuck, and with some dummy screws:
I ground another piece of toolsteel to size and milled the lip that engages the sliding parts onto it:
This piece was also cut into three parts:
And then faced to length, drilled and counter bored:
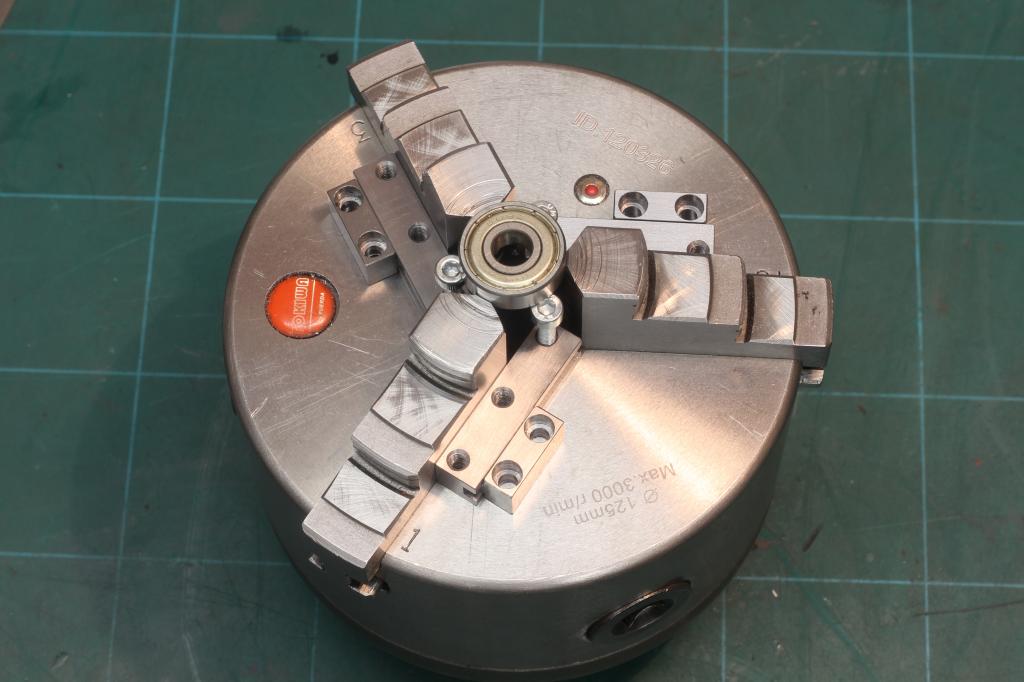
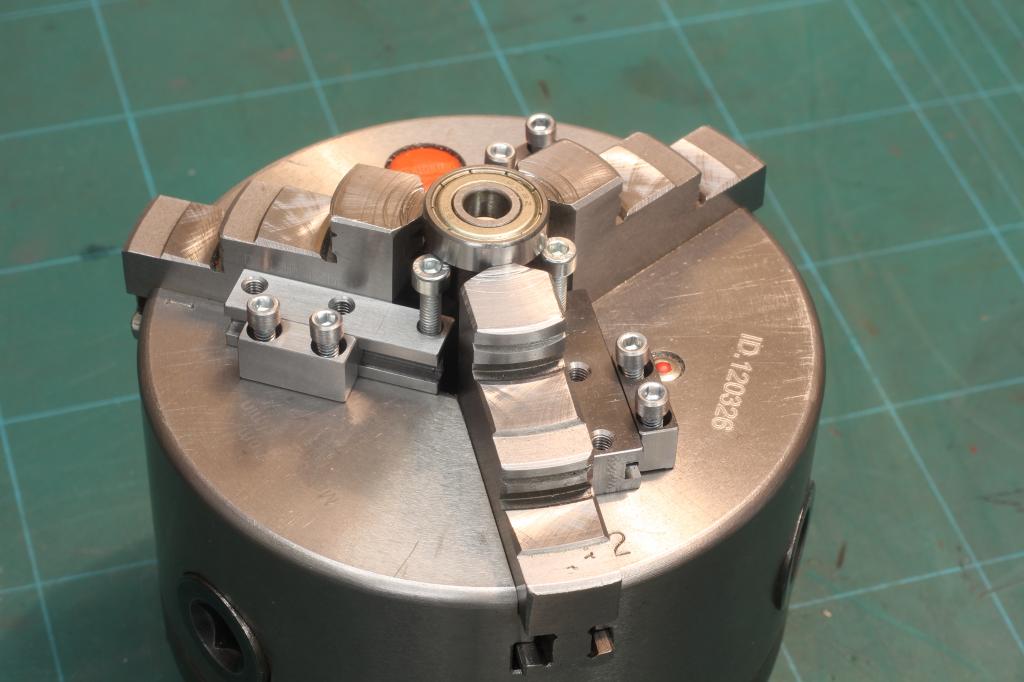
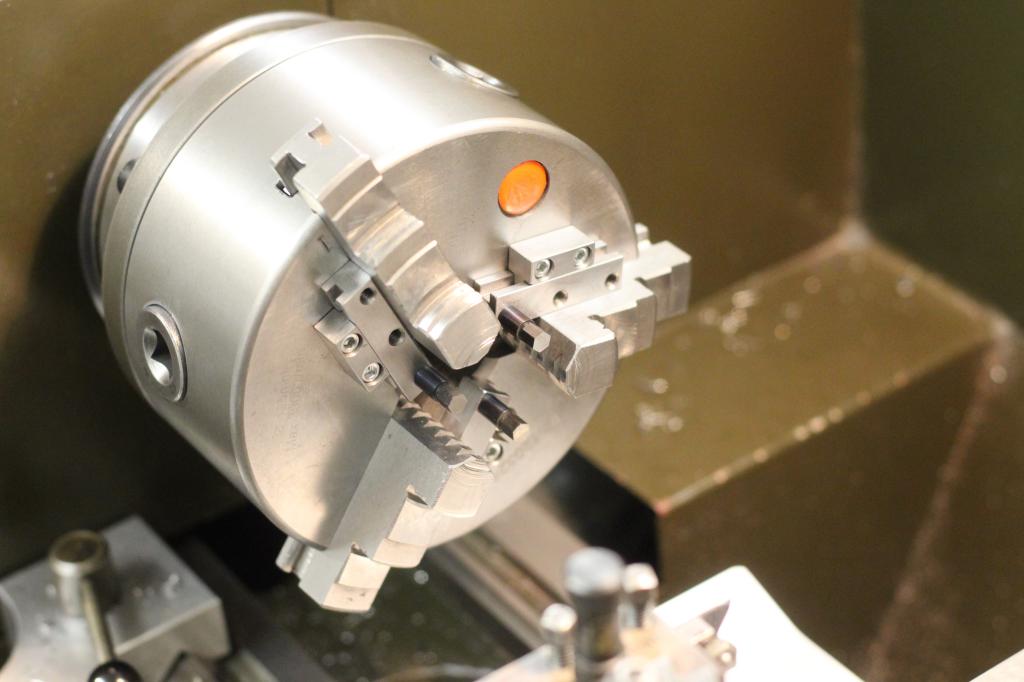
This is how the clamping segments will be mounted on the chuck:
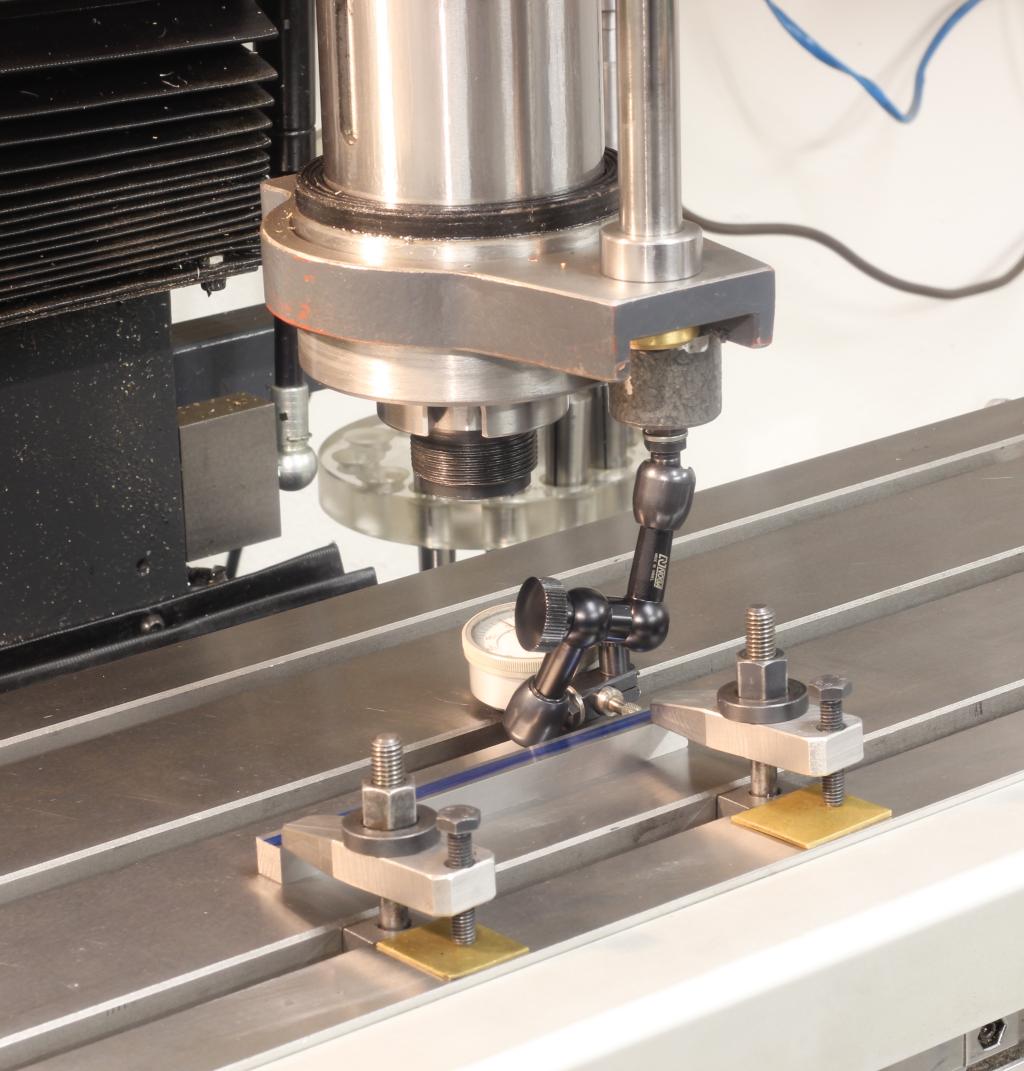
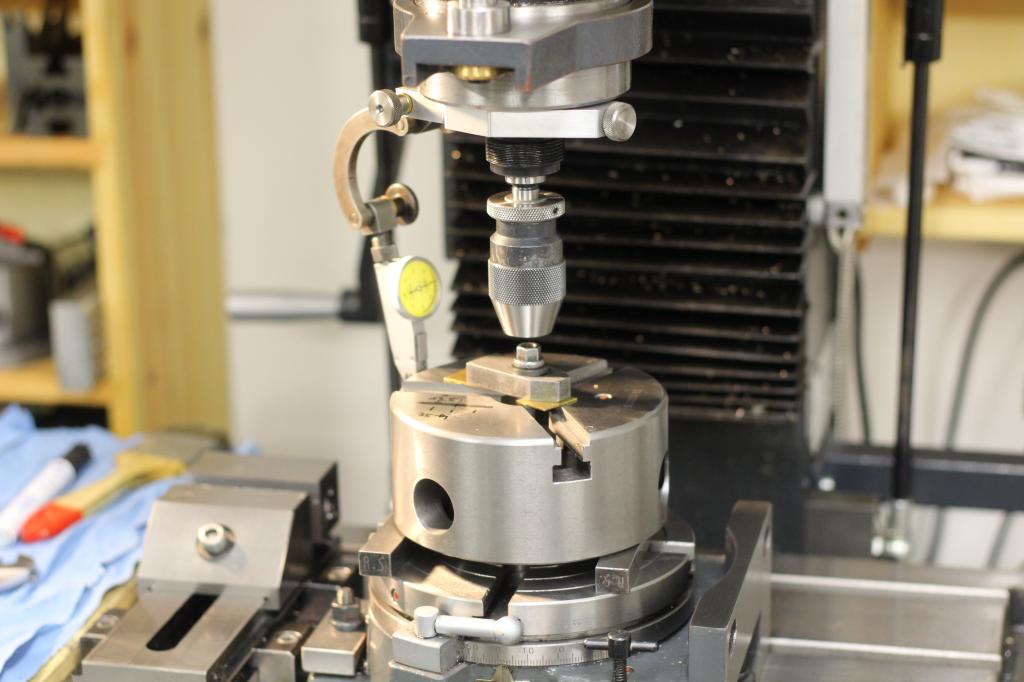
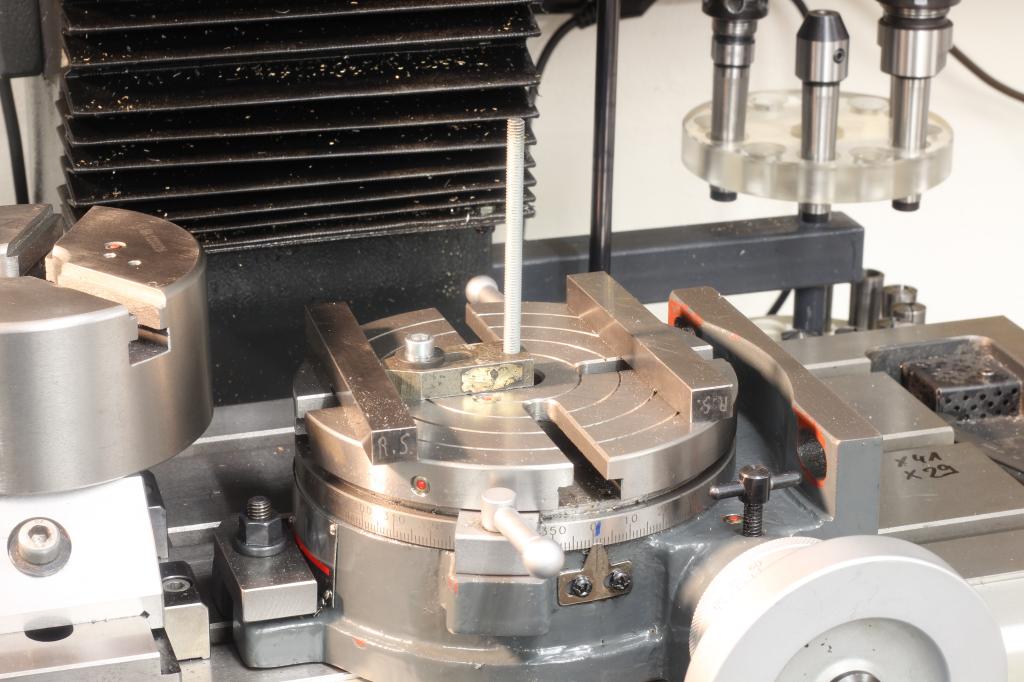
Now it is time to take the chuck apart and drill/tap it – It is also a good idea to clean it while it is off the backplate and taken apart:


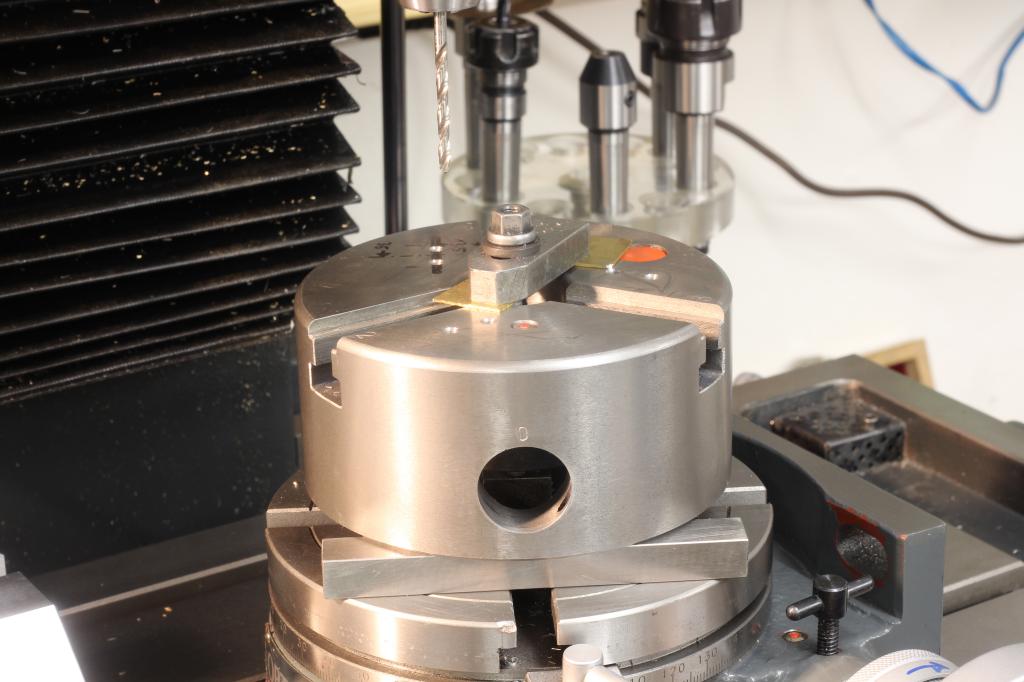
Setup on the rotary table to do drill/tap the chuck body:
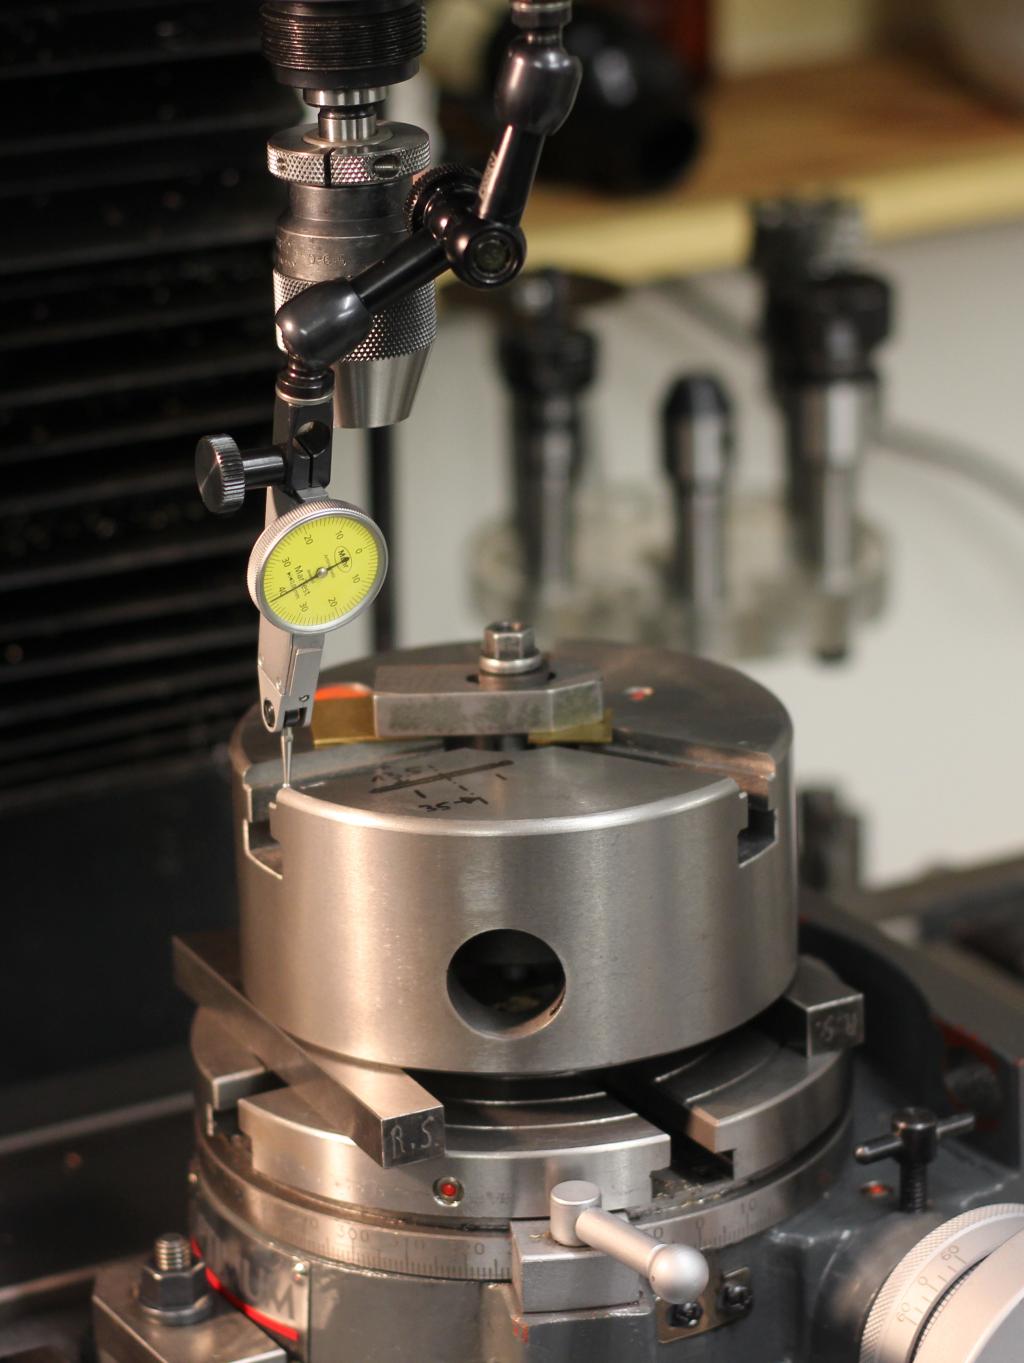
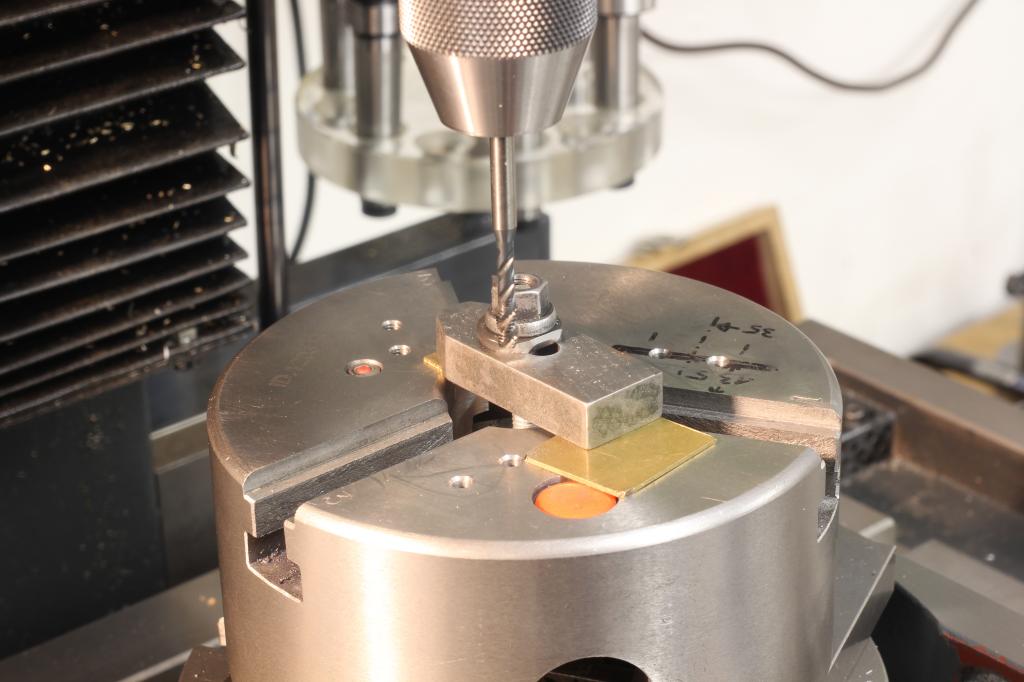
I did not drill trough into the chuck body, because that might be a way for dirt to get into the chuck:
When powertapping without a tapping head you need to be a bit carefull and have an eye on the depth stop of the quill. Make sure you stop about one time the pitch of the thread before you hit the hard stop – But that depends on your machine, mine stops pretty fast in backgear:
That’s how the chuckbody was clamped, with a single piece of threaded rod trough the center:
Then I made a first set of standoffs with a fixed height. They are turned from 6mm drill rod and have a 5mm hex milled on them:
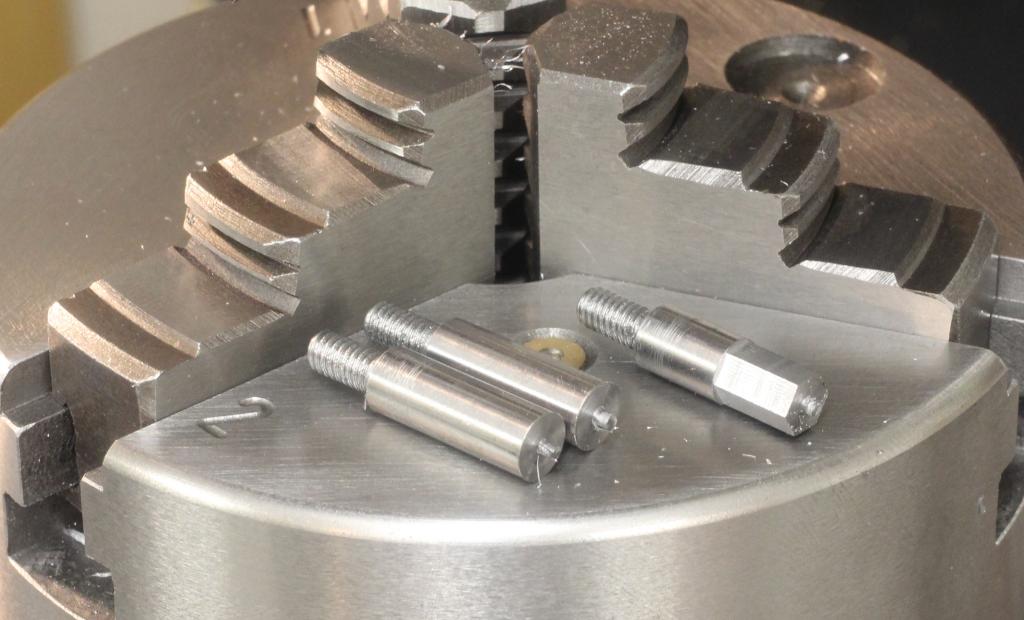
After hardening, I screwed all three of them into one of the sliding stops:
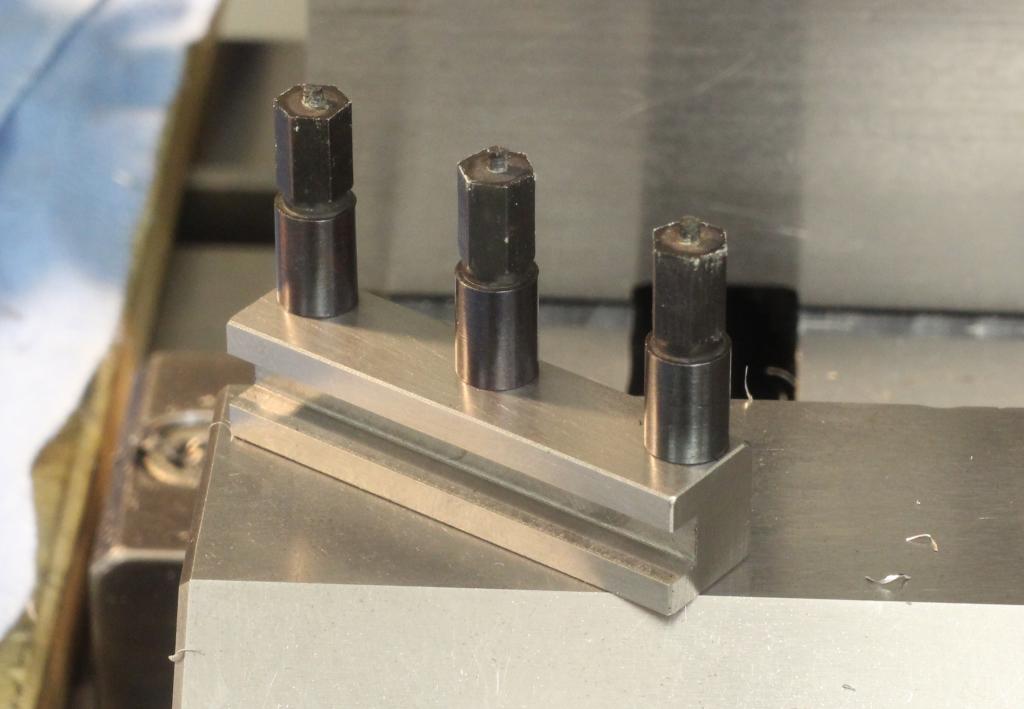
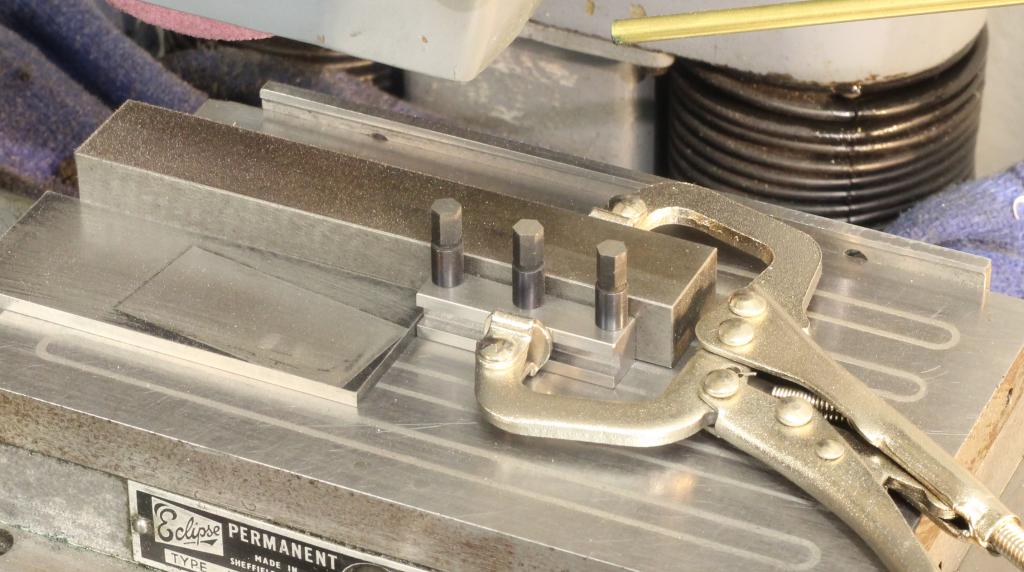
On the surfacegrinder they gut ground to exactly the same height:
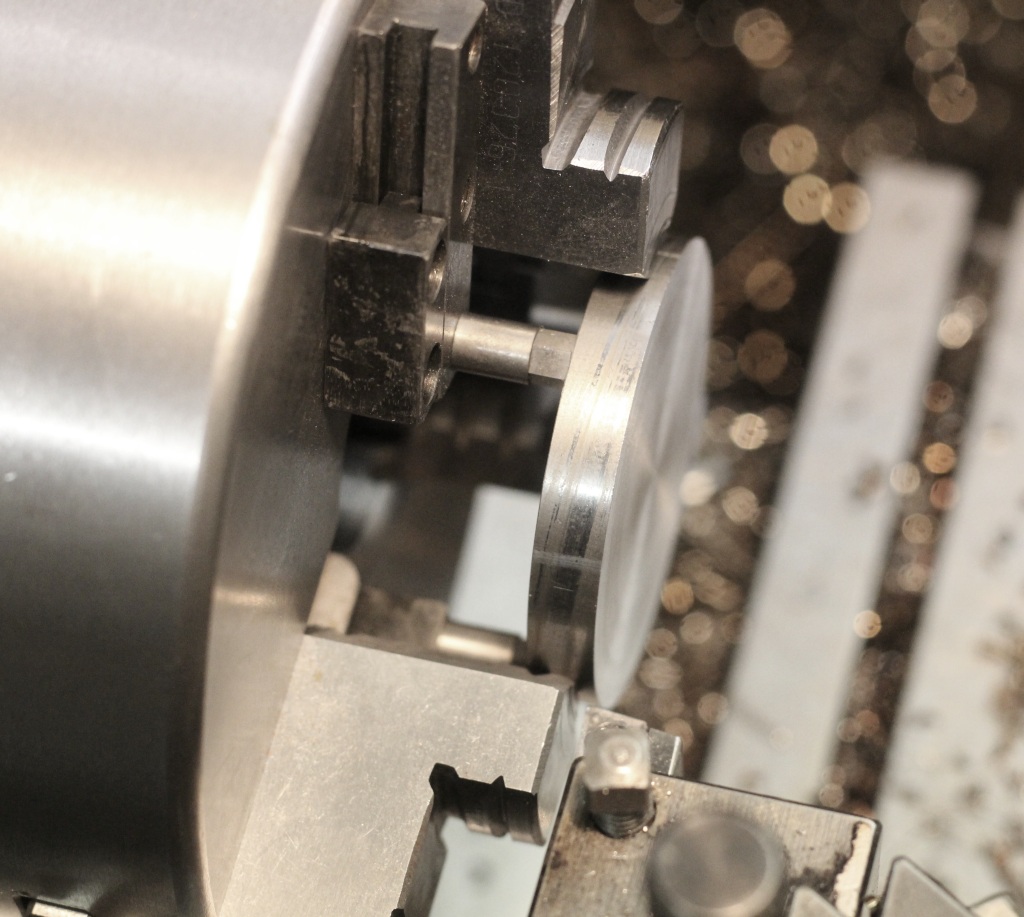
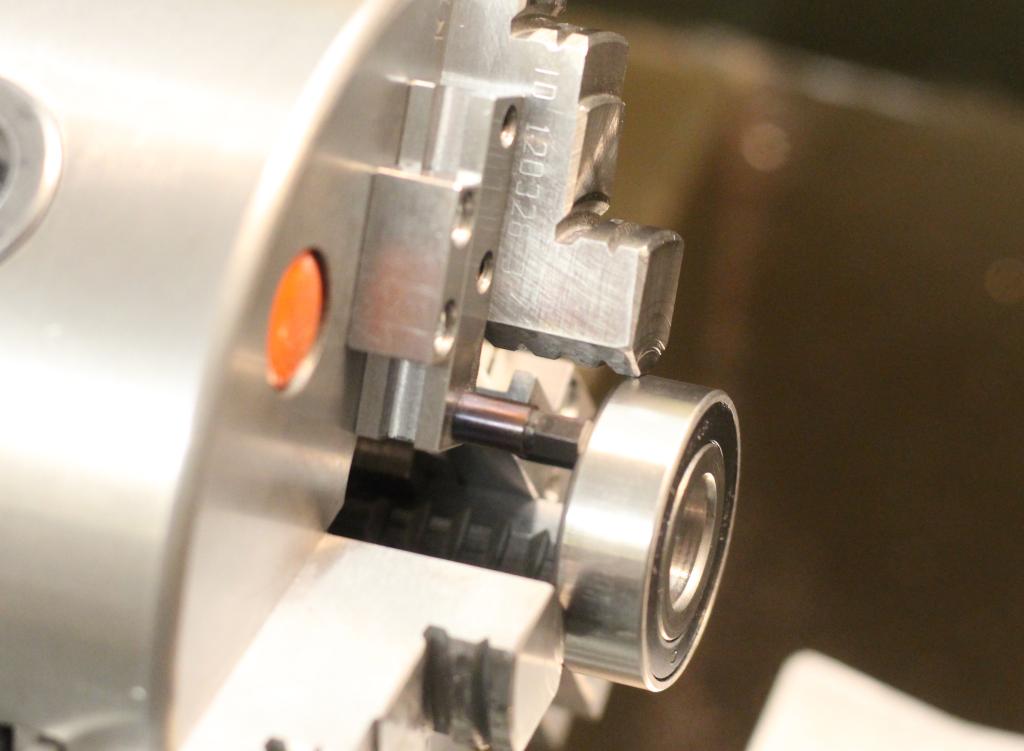
The finished backstop:
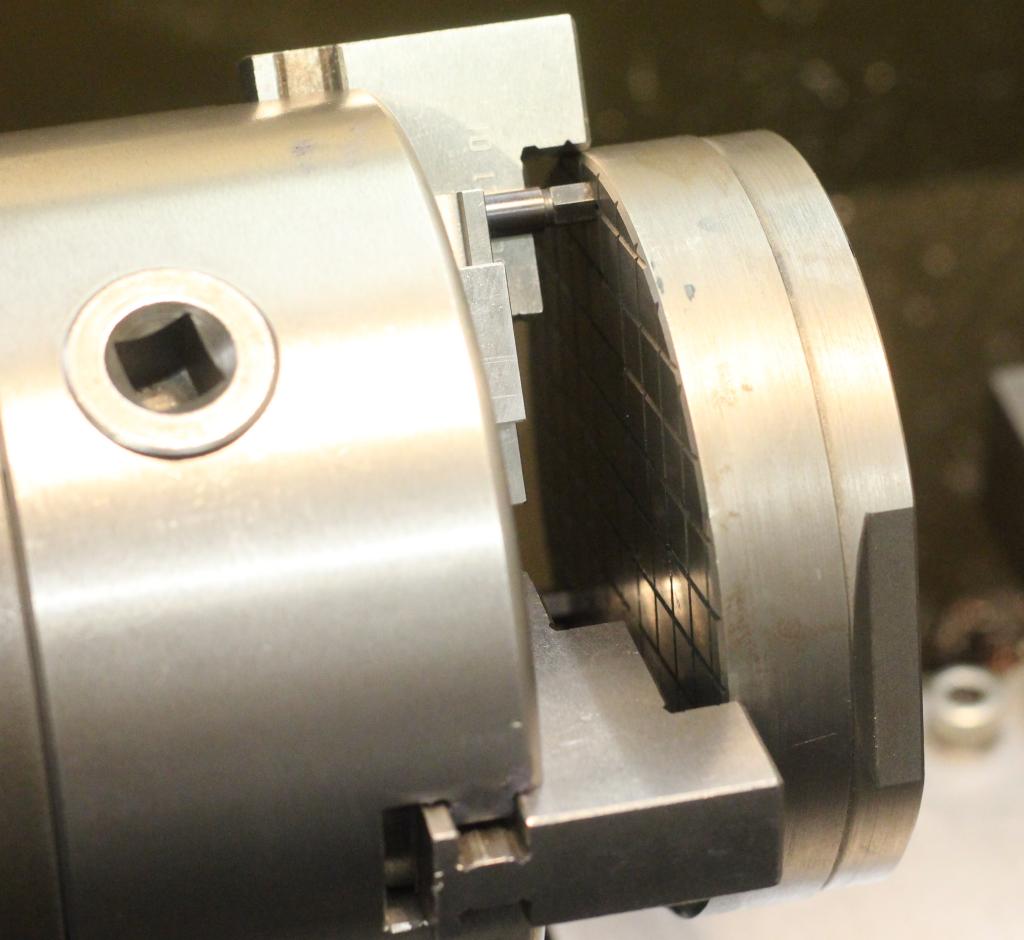
When not in use the threaded holes in the chuck get closed with some set screws:
I made two more sets of standoffs, but I did not harden them completely, only the head that supports the work is hardened with the oxyfuel torch. Otherwise the thread gets very fragile. The other parts got a treatment with black oxide finishing:
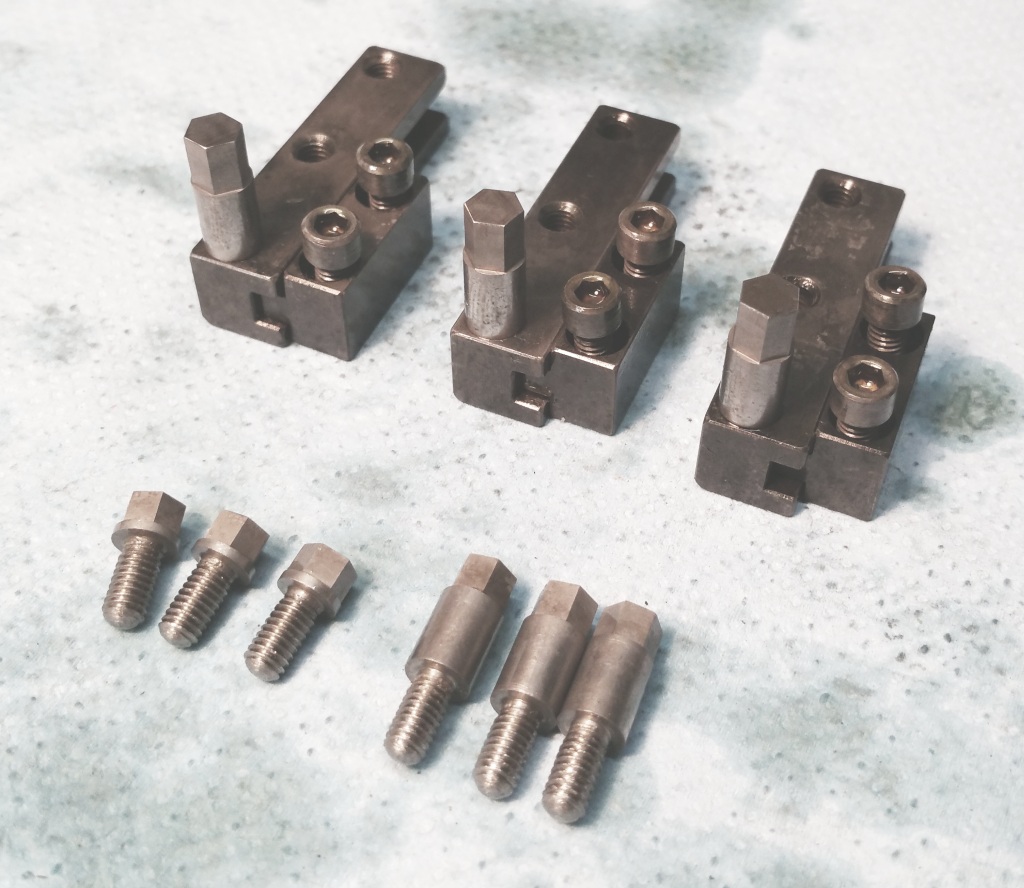
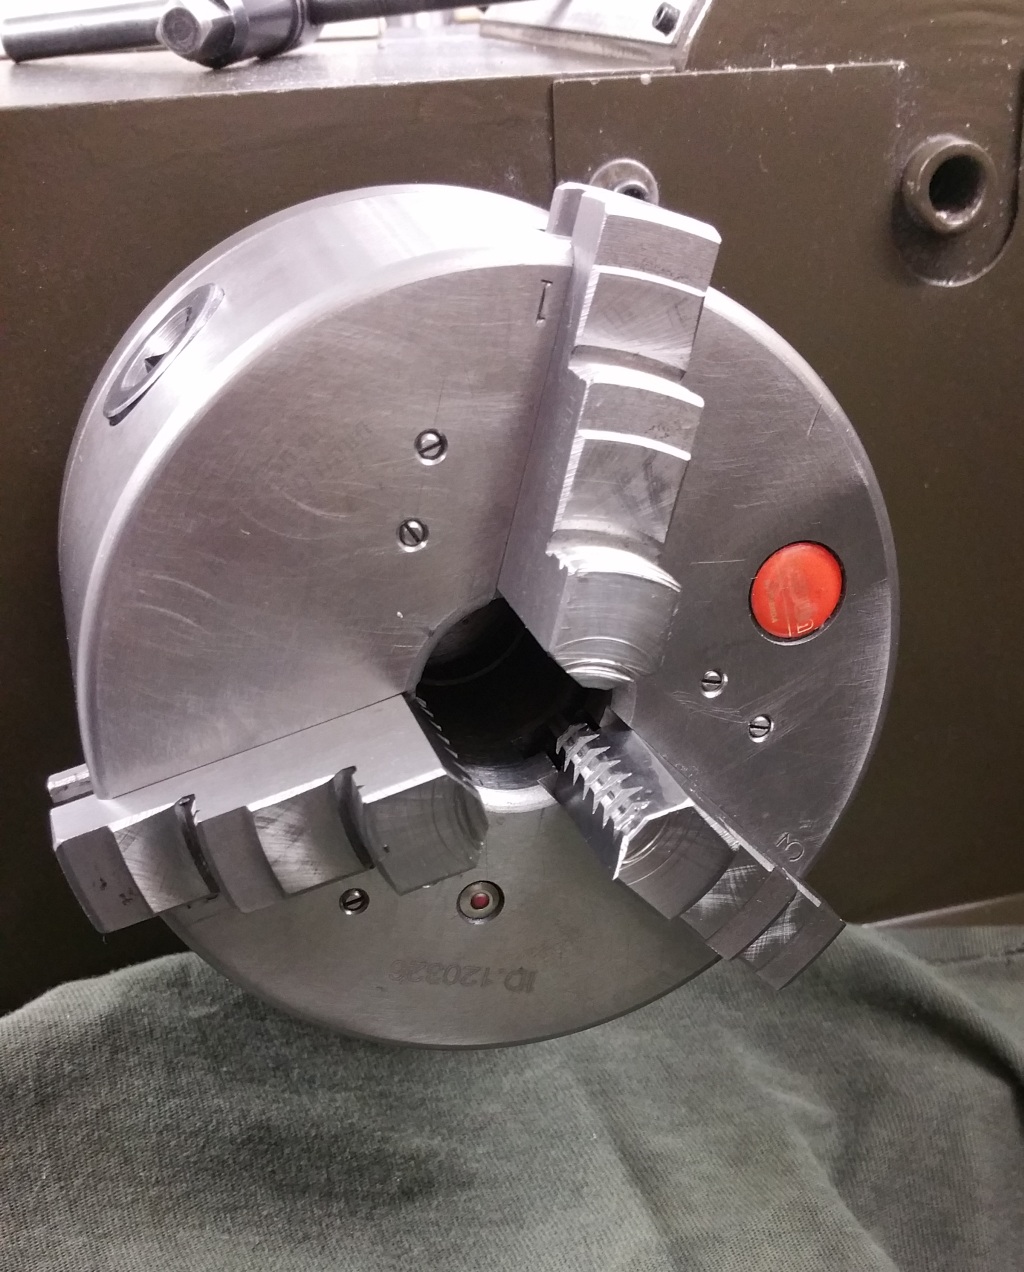
The complete set:
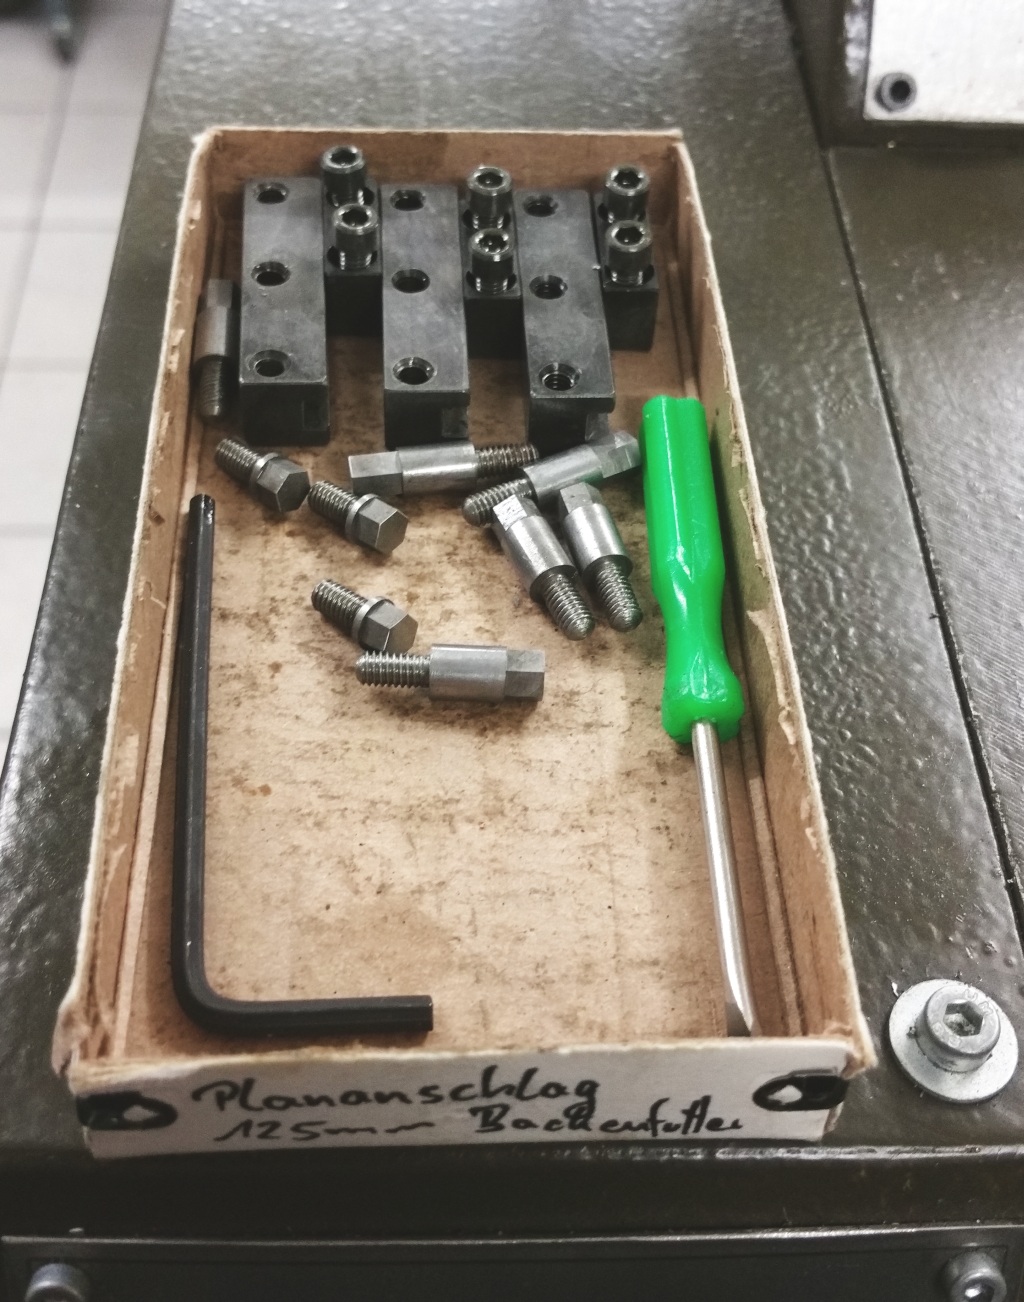
First practical use, machining some d50x7mm washers, it was very easy to hold thickness tolerance and parallelism down to 1/100mm: