More detailed articles on different aspects and modifications on the machine:
A video showing the engraving machine in detail::
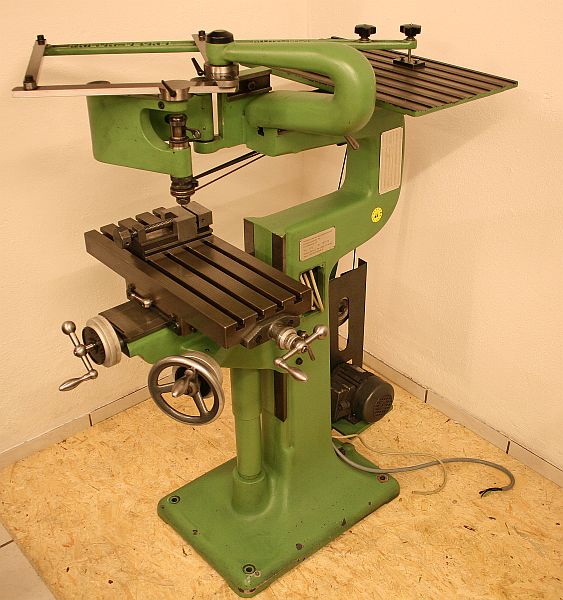
Shoptalk #2 / Deckel G1L Pantograph
Old time photographs of the engraving machine in use:
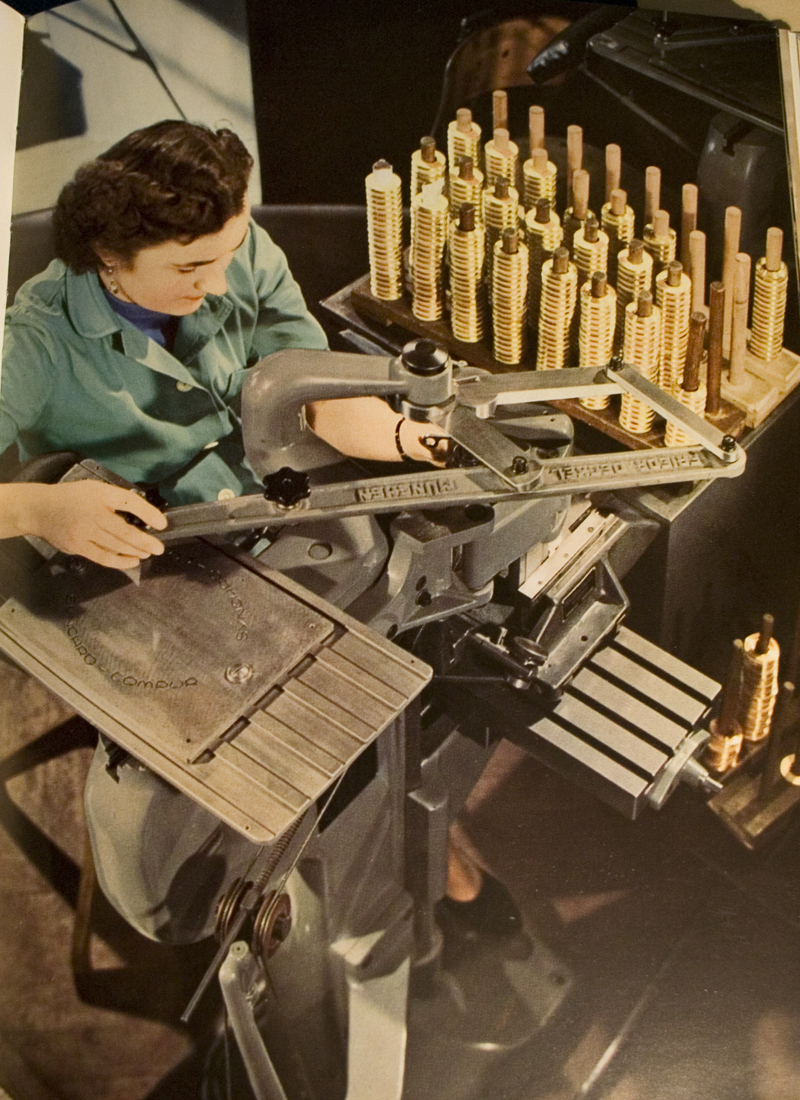
The first picture shows a production enviroment where those engraving machines where used a lot to do milling and engraving operations on a lot of parts. In this case, the machine is setup with a nice steel master template and the drum engraving attachement, as there are round parts engraved on the outer diameter.
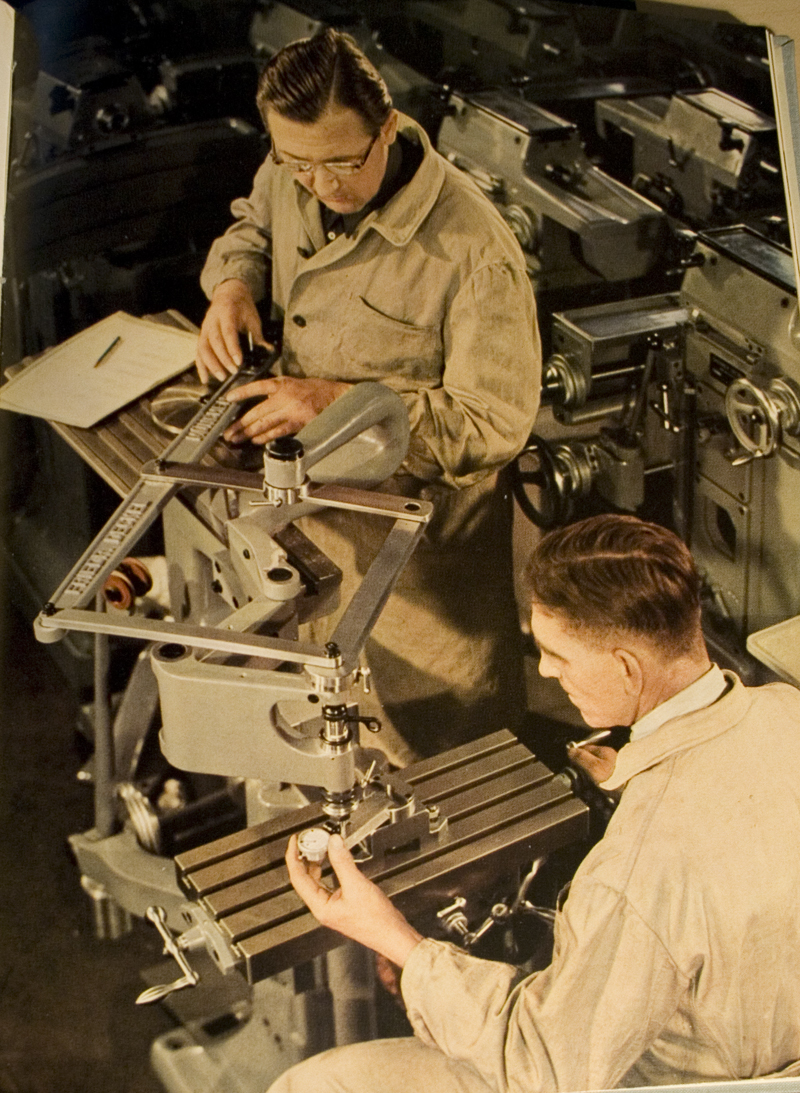
Note the two machinist/engineers on the second photograph that seem to test the geometry of the pantograph mechanism with something that looks very much like a oldschool variant of the ballbar test that is done today on cnc machines. In the background a row of Deckel Fp1 toolroom milling machines without a vertical head can be seen:
Some examples of work that was done on the engraving machine:
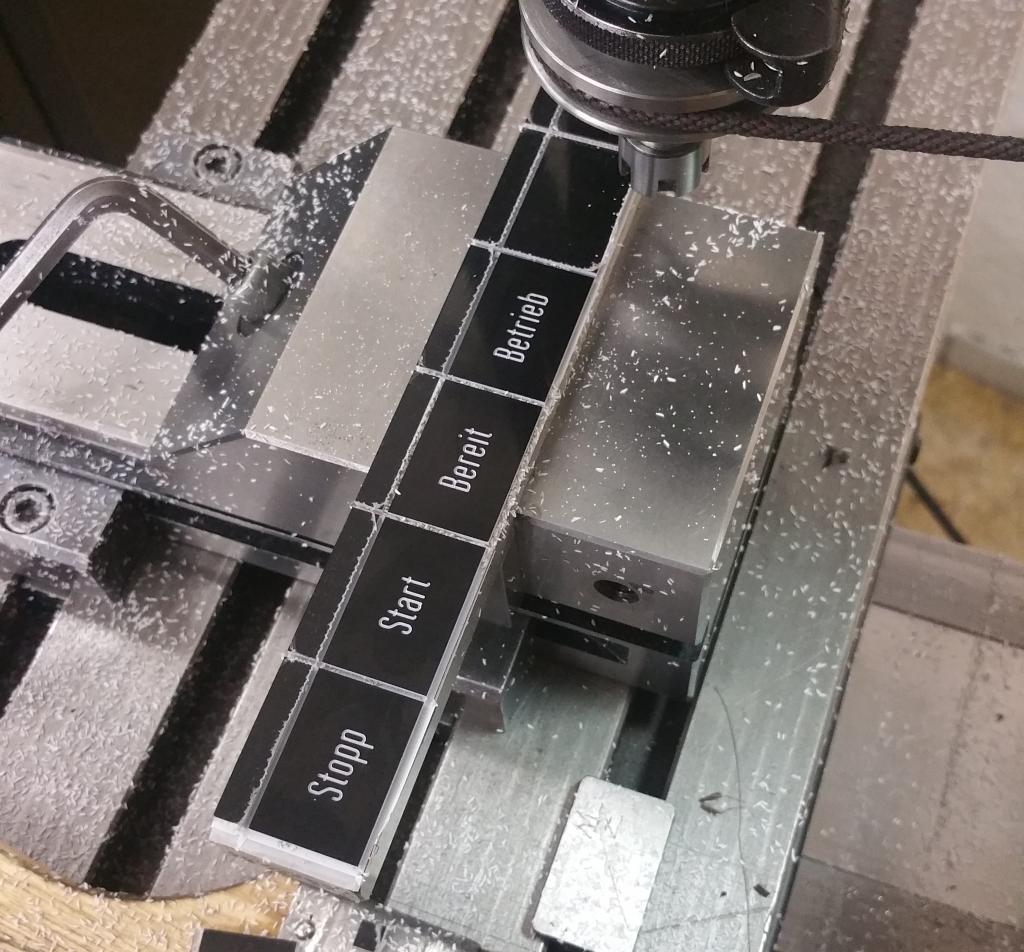
Signs in all forms and materials:
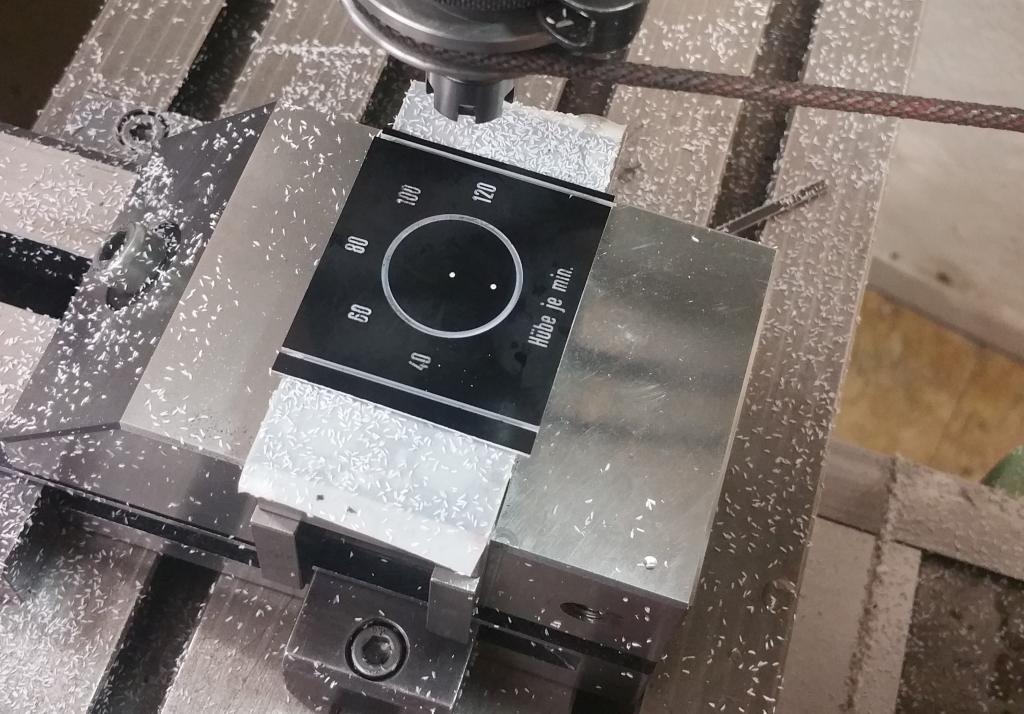
Dials - This is a very obvious task done on the engraving machine. Making all sorts of engraved dials.
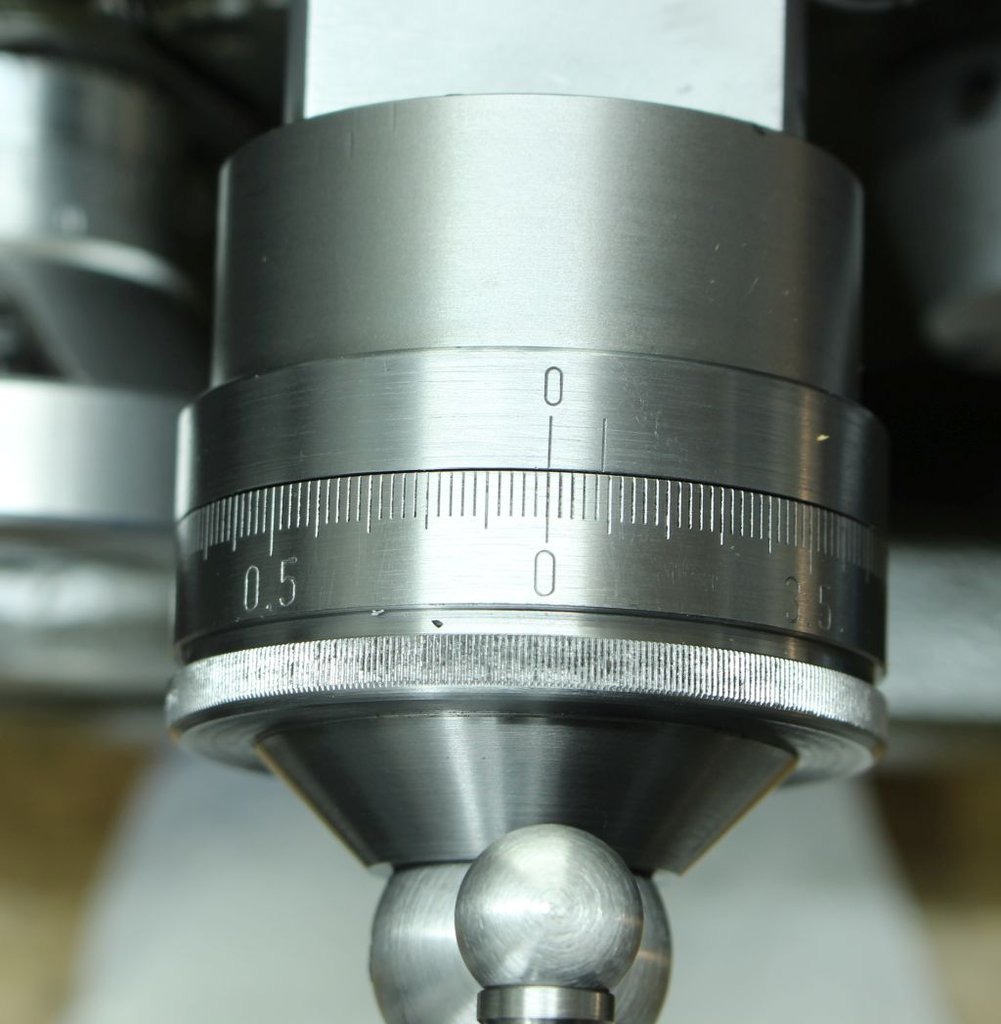
This dial is for the cross feed screw of my lathe:
A flat dial for an adjustable angle table using the small tilting rotary table (Built by Deckel for their engraving machines):
This is a tapered dial, engraved using the adjustable angle table and my big rotary table. This is where the G1L with its huge travel in Z direction and a lot of space below the engraving spindle realy shines:
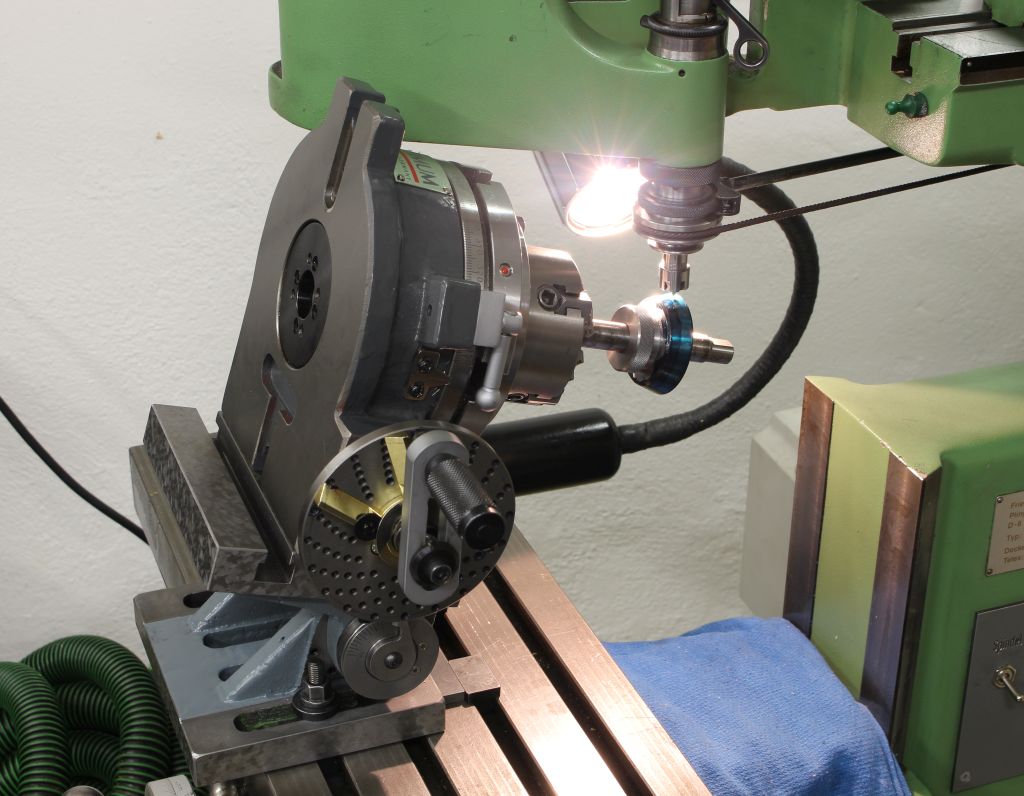
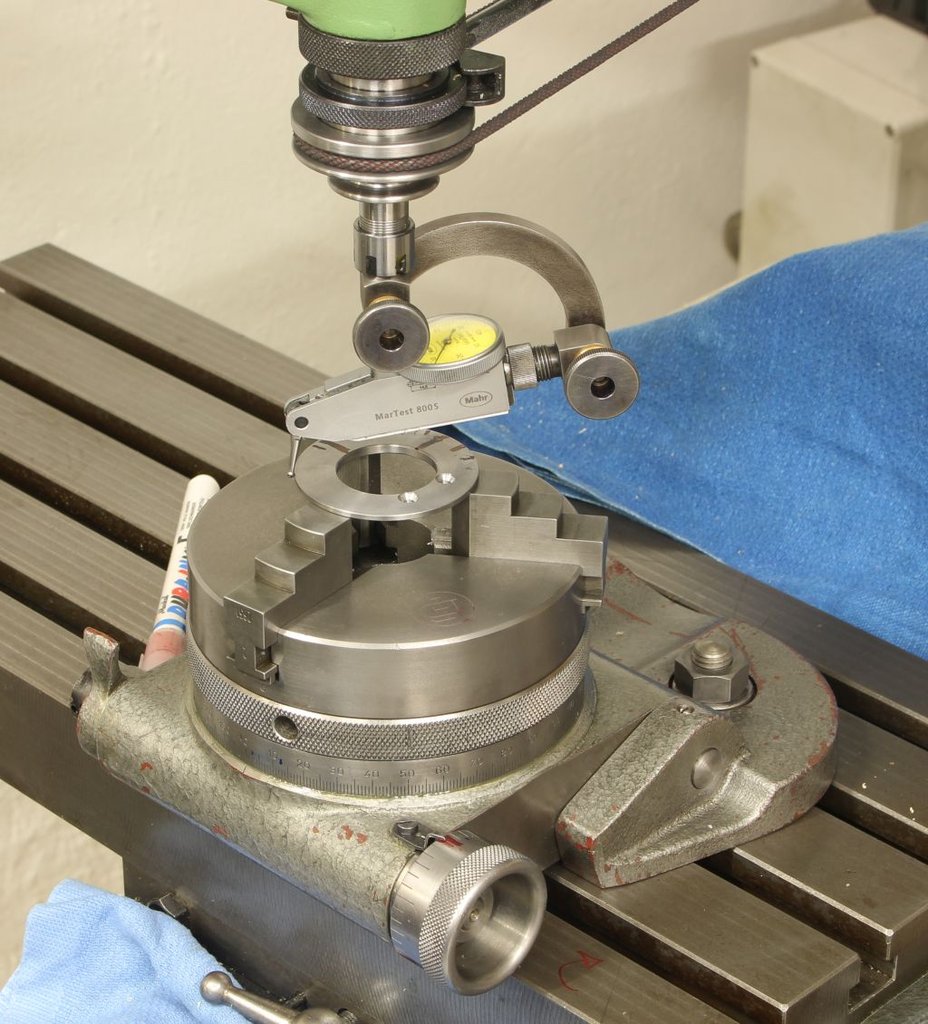
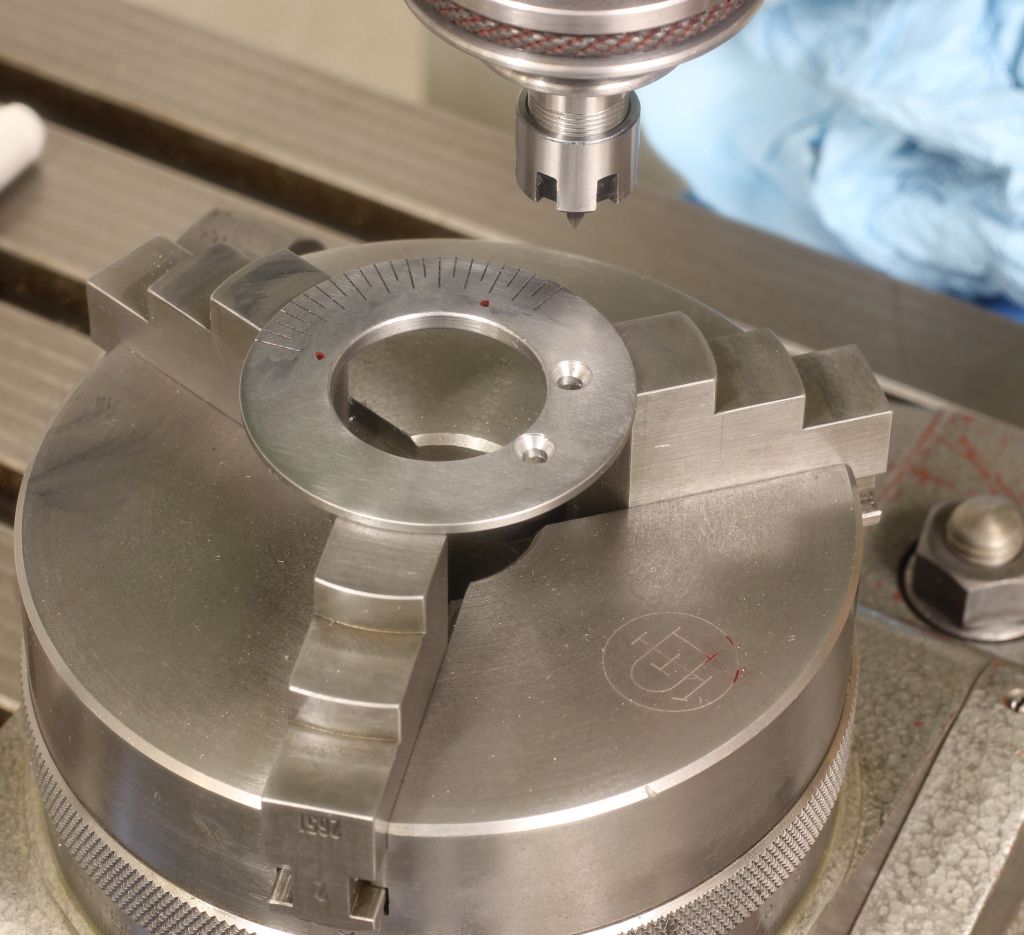
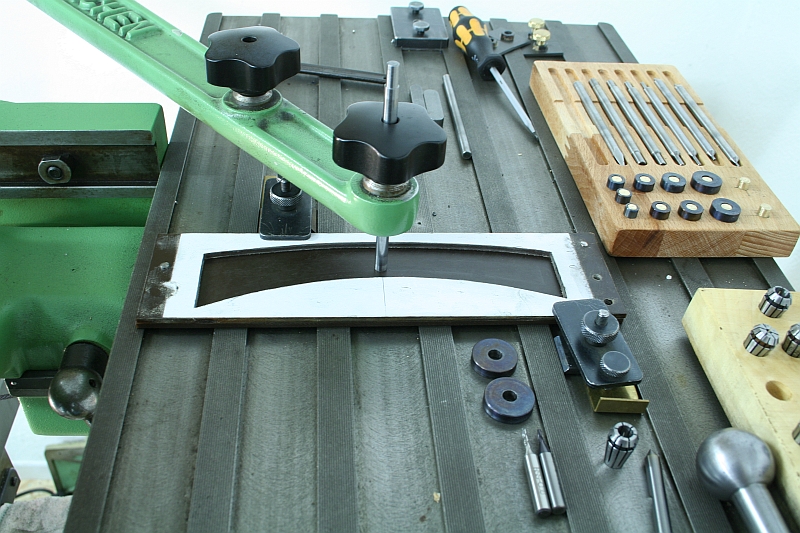
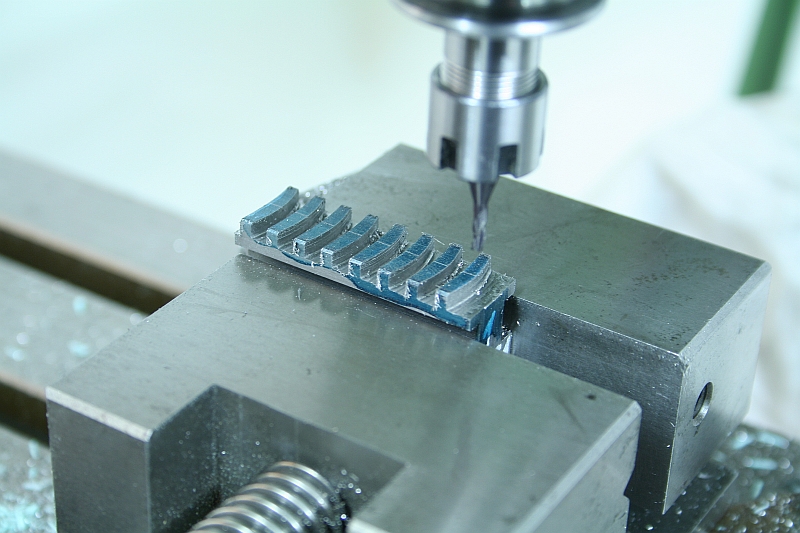
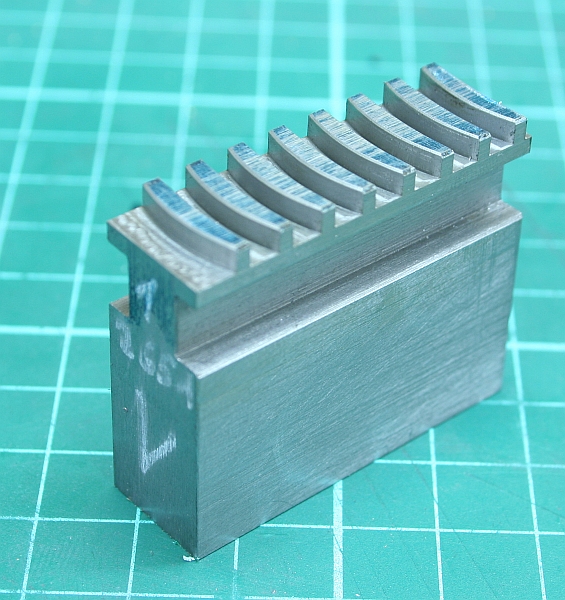
Chuck jaws - This was a more esotheric use, when I bought the small Deckel rotary table it was missing one set of chuck jaws. I machined a new set of jaws and used the engraving machine as a copy miller to cut the teeth in it. The template was cut by hand with a coping saw out of 3mm phenolic:
Profiling - Usefull for small model engineering parts. Just make a template of the shape you need out of some rigid material like plastic, phenolic or in a pinch even cardboard and use the engraving machine as a copy milling machine:

The nice thing is the fact that the error is reduced too - If you make the template 10 times bigger than the part and machine it with a 10:1 reduction, any error in the template will also be reduced by factor 10.
So if you have a 5/10mm error in your template you will end up with an error of 5/100mm on the final part.
With clever stacking indexing of multiplex templates you can create and machine quite complicated parts with a two dimensional engraving machine.